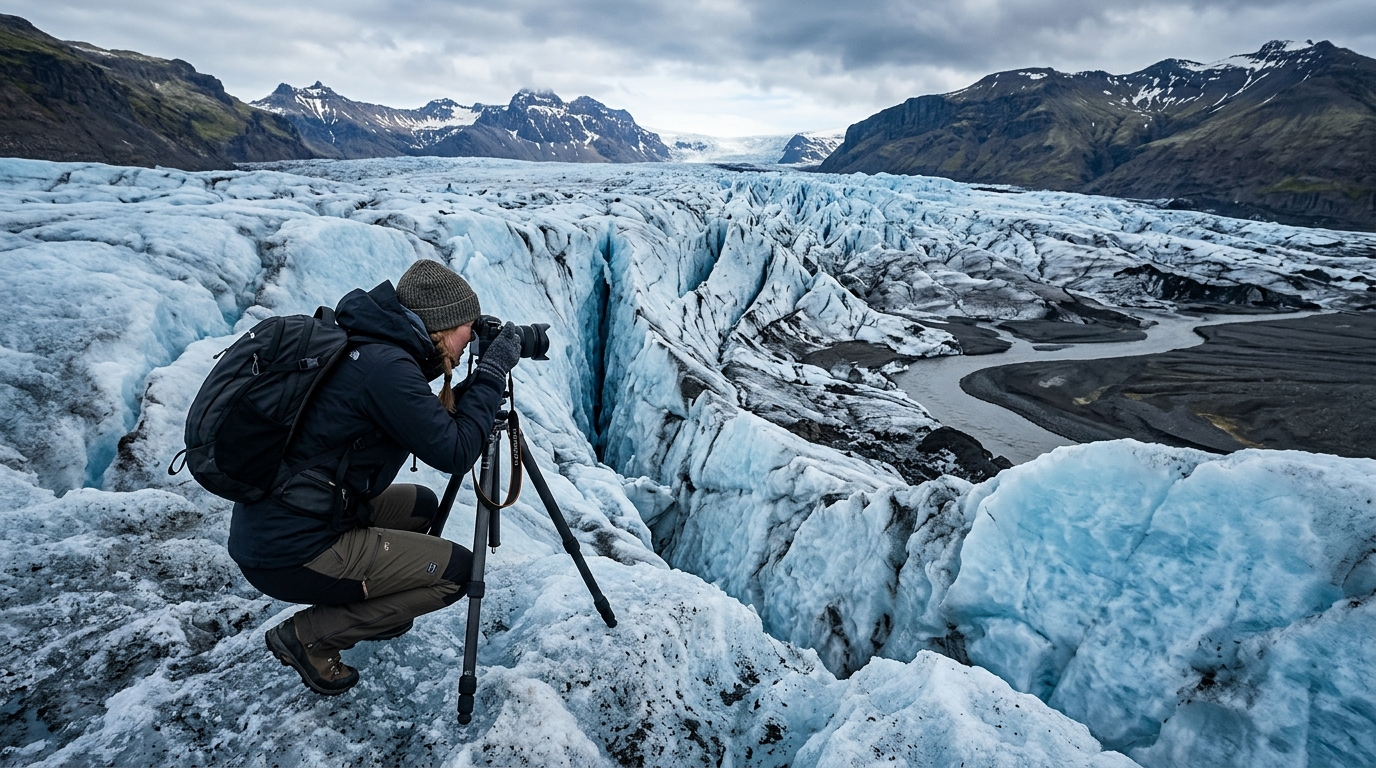
Introduction: The Allure of Iceland's Glacial Landscapes
Iceland, the Land of Fire and Ice, offers a photographic playground unlike anywhere else on Earth. Its dynamic landscape, sculpted by millennia of volcanic activity and glacial forces, presents an unparalleled opportunity for photographers seeking to capture raw, majestic beauty. From towering ice walls and deep, mysterious crevasses to serene glacier lagoons dotted with luminous icebergs and powerful meltwater rivers carving through black sands, the opportunities for stunning Iceland glacier photography are virtually endless. This comprehensive guide is designed for the serious photographer eager to delve into the frozen heart of Iceland. We'll equip you with the knowledge, techniques, and practical advice needed to navigate these challenging yet rewarding environments. Whether your goal is to immortalize the ethereal blue glow of an ice cave, the dramatic scale of a glacial tongue, or the intricate patterns of ice formations, prepare to unlock the secrets of capturing Iceland's spectacular glacial wonders.Essential Gear for Your Iceland Glacier Photography Expedition
Embarking on an Iceland glacier photography expedition demands meticulous preparation, especially when it comes to your equipment. The harsh, often unpredictable Icelandic weather, coupled with the unique challenges of shooting ice and snow, necessitates a robust and well-thought-out gear list.Camera Bodies and Lenses
For capturing the vastness of glacial landscapes, a full-frame or APS-C camera body capable of handling low light and harsh conditions is ideal. Look for models with good weather sealing. When it comes to lenses, versatility is key:- Wide-angle lenses (e.g., 14-24mm, 16-35mm): Essential for encompassing sweeping vistas, dramatic ice walls, and the sheer scale of glacier lagoons. These lenses excel at conveying depth and grandeur.
- Mid-range zoom lenses (e.g., 24-70mm, 24-105mm): A versatile workhorse for general landscape shots, capturing more specific compositions, and even some environmental portraits if you include human elements for scale.
- Telephoto lenses (e.g., 70-200mm, 100-400mm): Invaluable for isolating intricate ice formations, distant icebergs in glacier lagoons, wildlife like seals, or compressing perspectives to emphasize the layers of a glacial landscape.
Tripods: The Foundation of Stability
A sturdy tripod is non-negotiable for Iceland glacier photography. It's crucial for sharp images in low light, for long exposures, and for precise composition.- Material: Carbon fiber tripods are lighter to carry and less prone to vibration in strong winds compared to aluminum, though aluminum can be more stable in very specific, heavy-duty scenarios.
- Stability: Ensure your tripod can handle your heaviest camera and lens combination, especially in windy conditions. Consider adding weight to the center column hook if available.
- Feet: Rubber feet are standard, but spiked feet can offer better grip on ice or uneven terrain. Some tripods come with interchangeable feet.
Filters: Enhancing Your Shots
Filters are powerful tools that can significantly elevate your glacial photography:- Circular Polarizer (CPL) Filter: Absolutely essential. A CPL reduces glare from ice, water, and wet rocks, enhancing color saturation and revealing the incredible blue hues within the ice. It also helps to deepen blue skies.
- Neutral Density (ND) Filters: For long exposure photography, ND filters are vital. They reduce the amount of light entering the lens, allowing for slower shutter speeds. This is perfect for smoothing out turbulent glacial rivers, creating a dreamy effect on meltwater, or capturing the subtle movement of ice. A range from 3-stop to 10-stop is recommended.
- Graduated Neutral Density (GND) Filters: Useful for balancing exposure between a bright sky and a darker foreground, though modern cameras with good dynamic range and bracketing often make these less critical than in the past.
Protective Gear: Battling the Elements
Iceland's weather is notorious for being cold, wet, and windy, sometimes all at once. Protecting your gear is paramount:- Waterproof Camera Bag/Backpack: Invest in a high-quality, weather-sealed bag to protect your equipment from rain, snow, and spray.
- Rain Covers: Dedicated rain covers for your camera and lens provide an extra layer of defense when shooting in precipitation.
- Microfiber Lens Cloths: Bring several! Mist, spray, and snow can quickly obscure your lens, and clean cloths are essential for clear shots.
- Spare Batteries: Cold temperatures drastically reduce battery life. Carry multiple fully charged spare batteries close to your body to keep them warm.
- Lens Hoods: Not only do they reduce flare, but they also offer minor protection against bumps and light precipitation.
Safety Equipment: Beyond Photography
Your personal safety is always the top priority. Glacial environments can be dangerous, so proper safety gear is non-negotiable:- Microspikes or Crampons: Absolutely essential for walking on ice or packed snow, even on seemingly flat surfaces. often check conditions and requirements for specific areas.
- Warm, Waterproof Layers: Dress in multiple non-cotton layers (base, mid, outer shell) to stay warm and dry. Waterproof jacket and pants are a must.
- Insulated Boots: Waterproof, insulated hiking boots with good ankle support are critical for warmth, grip, and comfort.
- Hat, Gloves, Buff: Protect extremities from the cold and wind.
- Headlamp: Indispensable for early morning, late evening, or winter shoots, especially near crevasses or uneven terrain.
- Communication Device: A fully charged mobile phone (though reception can be spotty in remote areas) and potentially a satellite messenger for truly off-grid adventures.
- First-Aid Kit and Emergency Blanket: often be prepared for minor injuries or unexpected delays.
- Thermos with Hot Drink: A small luxury that can make a huge difference in morale and warmth.
Mastering Techniques for Capturing Dynamic Ice Formations and Textures
Capturing the essence of Iceland's glaciers goes beyond simply pointing and shooting. It requires a thoughtful approach to composition, exposure, focus, and white balance to truly convey the raw power and subtle beauty of these frozen giants.Composition: Guiding the Eye Through Ice Structures
Effective composition transforms a mere snapshot into a compelling image. When photographing ice formations and textures, consider these principles:- Leading Lines: Utilize natural lines formed by crevasses, meltwater channels, or the edges of ice formations to draw the viewer's eye into and through the frame. These lines create depth and direct attention.
- Rule of Thirds: Position key elements, such as a striking ice pinnacle or a human figure for scale, along the intersecting lines or at the points of intersection to create a balanced and engaging composition.
- Negative Space: Don't be afraid to use the vast, often stark, expanses of ice or sky as negative space. This can emphasize the isolation and grandeur of a single ice formation, allowing it to breathe within the frame.
- Scale: Glaciers are immense. Introduce a human element (if safe and appropriate) or a familiar object to provide a sense of scale and convey the sheer magnitude of the ice.
- Patterns and Textures: Look for repeating patterns in the ice – the striations, the bubbles, the cracks. Get close to capture intricate textures that tell a story of millennia of formation and movement.
Exposure: Dealing with Bright Ice and Snow
Exposing correctly for bright scenes dominated by ice and snow is one of the biggest challenges in glacier photography. Your camera's meter often tries to render bright scenes as a middle grey, leading to underexposed, dull images.- Exposure Compensation: As a general rule, overexpose by +1 to +2 stops when shooting bright snow and ice to ensure they appear white, not grey. often check your histogram to avoid blowing out highlights (losing detail in the brightest areas).
- Histogram: Learn to read your histogram. It's your most reliable tool for assessing exposure in challenging conditions. Aim for a histogram that is pushed to the right, but without clipping the highlights.
- Bracketing: When in doubt, or in high-contrast situations (e.g., bright ice against a dark rock face), bracket your exposures. Take multiple shots at different exposure levels (e.g., -1, 0, +1 stops) and blend them later in post-processing for optimal dynamic range.
- Aperture Priority Mode (Av/A): This mode allows you to control depth of field (important for landscapes) while the camera sets the shutter speed. Combine with exposure compensation.
Focusing: Achieving Sharpness Across the Landscape
Sharp focus is paramount for showcasing the intricate details of ice and the vastness of the glacial landscape.- Hyperfocal Distance: For sweeping landscape shots where you want everything from the foreground to the distant mountains in focus, learn about hyperfocal distance focusing. This involves focusing at a specific point to maximize depth of field, often achieved by stopping down your aperture (e.g., f/11 or f/16).
- Manual Focus: In low light or when focusing on very specific details (like a tiny air bubble in ice), manual focus can be more precise than autofocus. Use live view and zoom in to ensure pinpoint sharpness.
- Single Point Autofocus: For isolating a particular ice formation or an iceberg, use single-point autofocus and place the focus point precisely on your desired subject.
White Balance: Capturing the True Blues and Whites of Glacial Ice
Glacial ice is renowned for its stunning blue hues, which can be tricky to capture accurately. Automatic white balance (AWB) often tries to neutralize these colors, making the ice appear bland.- Custom White Balance: The most accurate method is to set a custom white balance using a grey card or a neutral reference in the scene.
- Kelvin Temperature: Manually setting your Kelvin temperature allows for precise control. Lower Kelvin values (e.g., 5000-6500K) tend to warm up an image, while higher values (e.g., 7000-8000K) can enhance the cool blue tones of the ice. Experiment to find the balance that best represents the scene.
- Shade/Cloudy Presets: These presets often add a slight warmth that can counteract the blue cast, but may sometimes mute the natural blue of the ice. Shoot in RAW to allow for maximum flexibility in adjusting white balance during post-processing.
Long Exposures: Smoothing Glacial Rivers and Capturing Ice Movement
Long exposure photography is a powerful technique for adding a sense of motion and serenity to your glacial images.- Smoothing Water: Use ND filters to achieve shutter speeds of several seconds or even minutes. This will transform turbulent glacial rivers and meltwater streams into silky, ethereal flows, emphasizing their movement and power.
- Capturing Subtle Movement: While glaciers move slowly, very long exposures (minutes to hours, often requiring specialized equipment) can sometimes capture the subtle blurring of ice in motion, though this is more advanced.
- Creating a Sense of Time: Long exposures can evoke a timeless quality, especially when combined with static ice formations, contrasting the ancient stillness of the ice with the dynamic flow of water.
Photographing Iceland's Iconic Glacier Lagoons: Jökulsárlón and Fjallsárlón
The glacier lagoons of Iceland, particularly Jökulsárlón and its quieter neighbor Fjallsárlón, are absolute must-visit locations for any photographer seeking breathtaking glacier lagoon photography. These dynamic landscapes, where ancient ice meets open water, offer an ever-changing canvas of light, color, and form.Best Times to Visit: Chasing the Light
The timing of your visit profoundly impacts the photographic opportunities at the lagoons:- Golden Hour (Sunrise/Sunset): This is prime time. The low angle of the sun bathes the icebergs in warm, soft light, creating incredible colors ranging from fiery oranges and pinks to deep blues and purples. Reflections on the calm water surface can be absolutely stunning. Early morning often brings fewer crowds.
- Blue Hour: Just before sunrise and after sunset, the sky takes on a deep, rich blue hue. This light enhances the natural blues of the ice, creating a serene and often dramatic atmosphere. It's an excellent time for moody, contemplative shots.
- Aurora Borealis Opportunities (Winter): During the winter months (September to April), if conditions are right, you might be lucky enough to witness the Northern Lights dancing above the icebergs. This is a challenging but incredibly rewarding photographic experience, requiring a fast lens, high ISO, and a stable tripod.
- Overcast Days: Don't dismiss cloudy days! Soft, diffused light can be excellent for bringing out subtle textures and colors in the ice, reducing harsh shadows and creating a more even exposure.
Composition with Icebergs: Foreground Interest, Reflections, and Scale
Icebergs are the stars of the glacier lagoons, and composing with them requires careful thought:- Foreground Interest: Look for smaller, interesting ice chunks near the shore to use as foreground elements. These add depth and draw the viewer's eye into the scene.
- Reflections: On calm days, the mirror-like surface of the lagoon can reflect the icebergs and surrounding mountains, creating symmetrical and ethereal compositions. Get low to the water's edge to maximize reflections.
- Scale: Use the vastness of the lagoon and the surrounding mountains to emphasize the scale of the icebergs. A distant boat or a person on the shore can also provide a sense of proportion.
- Isolation: Sometimes, isolating a single, uniquely shaped iceberg can create a powerful, minimalist image.
- Patterns: Look for patterns formed by clusters of icebergs or the way light interacts with their surfaces.
Capturing Wildlife: Seals in the Lagoons
Both Jökulsárlón and Fjallsárlón are home to seals, especially during the warmer months. Keep an eye out for them swimming gracefully between the icebergs or resting on them. A telephoto lens (200mm or more) will be essential for capturing clear shots without disturbing them. Be patient and wait for them to surface or interact with their environment.Drone Photography Considerations
Drone photography can offer unparalleled aerial perspectives of the glacier lagoons, showcasing the intricate patterns of ice and water from above. However, it is crucial to adhere strictly to local regulations and safety guidelines. As of 2026, drone regulations in Iceland are managed by the Icelandic Transport Authority (ICETRA) ICETRA Drone Regulations. Always check the latest rules, especially regarding protected areas, national parks, and proximity to people or wildlife. Respect designated no-fly zones, which are often in place for environmental protection or safety reasons. Fly responsibly and considerately.Tips for Shooting Diamond Beach Ice
Just across the road from Jökulsárlón is Diamond Beach, where icebergs from the lagoon wash ashore onto the black volcanic sand. This creates a striking contrast and unique photographic opportunities:- Waves and Motion Blur: Use slower shutter speeds (e.g., 0.5 to 2 seconds) to capture the movement of the waves as they wash over and around the ice chunks, creating a soft, misty effect. A tripod is essential here.
- Composition: Look for uniquely shaped ice formations against the black sand. Use the receding waves to create leading lines.
- Time of Day: Golden hour light makes the ice glow, while blue hour can emphasize the stark contrast and cool tones.
- Tides: The number and size of ice chunks on the beach vary with the tides and glacial activity. Check tide tables if possible, but also be prepared for whatever nature presents.
- Safety: Be aware of rogue waves, which can be larger than expected and dangerous. rarely turn your back on the ocean.
Safety and Ethical Considerations for Glacier Photography
While the allure of Iceland's glaciers is undeniable, these are wild and powerful environments that demand respect, caution, and a strong commitment to safety and ethical practices. Ignoring these considerations can lead to dangerous situations for yourself and damage to the fragile ecosystem.Importance of Guided Tours for Glacier Hiking and Ice Cave Exploration
This cannot be stressed enough: **do not venture onto a glacier or into an ice cave without a certified guide.**- Glacier Hiking: Glaciers are constantly moving, dynamic entities riddled with hidden dangers like crevasses (deep cracks), moulins (vertical shafts), and unstable ice formations. A qualified glacier guide possesses the expertise, specialized equipment (crampons, ice axes, ropes), and local knowledge to navigate these hazards safely. They understand the ice conditions, weather patterns, and safe routes, which can change daily.
- Ice Cave Exploration: Natural ice caves are inherently unstable and can collapse without warning. Their formation, stability, and accessibility are entirely dependent on seasonal conditions. Guides are trained to assess these risks and know which caves are safe to enter and when. Attempting to find or enter ice caves independently is extremely dangerous and can be fatal. Many ice caves are also on private land or within national park boundaries, requiring permits and guides. For comprehensive information on safety and rules within the Vatnajökull National Park, consult their official guidelines on the Vatnajökull National Park website.
Understanding Glacial Hazards: Crevasses, Icefall, Changing Conditions
Even from a distance, it's vital to understand the inherent dangers of glaciers:- Crevasses: These deep cracks in the ice can be hidden under a thin layer of snow, forming "snow bridges" that can collapse. rarely walk on a glacier without a guide who can identify these dangers.
- Icefall and Seracs: Large chunks of ice can break off from glacial fronts (calving) or from unstable ice formations called seracs, especially on steeper parts of a glacier. This can happen suddenly and without warning, creating dangerous projectiles and waves in glacier lagoons. Maintain a safe distance from glacier edges.
- Changing Conditions: Glaciers are constantly evolving. Weather can change rapidly, affecting visibility, ice stability, and meltwater levels. What looks safe one day might be treacherous the next.
- Hypothermia: The cold, wind, and wet conditions can quickly lead to hypothermia, even in summer. Dressing appropriately in layers is crucial.
Environmental Responsibility: Leave No Trace Principles, Respecting Nature
As photographers, we have a responsibility to protect the natural beauty we seek to capture:- Leave No Trace: Adhere strictly to the "Leave No Trace" principles. Pack out everything you pack in, including all trash (even organic waste like fruit peels). Do not disturb wildlife, plants, or geological features.
- Stay on Marked Paths: Where paths or viewing platforms exist, stick to them. Going off-trail can damage fragile vegetation, accelerate erosion, and put you in dangerous areas.
- Respect Wildlife: Maintain a respectful distance from any wildlife you encounter. Do not feed animals or try to elicit reactions for a photo.
- Be Mindful of Your Impact: The presence of many photographers can impact a location. Be aware of your footprint, avoid blocking views for others, and minimize disruption.
Personal Safety: Dressing Appropriately, Staying Hydrated, Informing Others
Beyond the specific glacial hazards, general outdoor safety applies:- Dress Appropriately: As mentioned in the gear section, multiple warm, waterproof, non-cotton layers are essential. Insulated, waterproof hiking boots are a must.
- Stay Hydrated and Fueled: Carry plenty of water (even in cold weather, you can get dehydrated) and snacks.
- often inform someone of your itinerary: If you are venturing into a remote area, even if it's just a day hike, often inform someone of your itinerary, including your route and expected return time.
- Be Aware of Your Surroundings: often pay attention to changing weather, terrain, and any warning signs. Don't let the pursuit of a photo override your common sense or safety instincts.
Beyond the Ice: Capturing Glacial Rivers, Meltwater, and Outwash Plains
While the majestic ice formations and tranquil lagoons often steal the spotlight in Iceland glacier photography, the landscapes born from the glaciers' retreat are equally compelling. Glacial rivers, powerful meltwater streams, and vast outwash plains (sandurs) offer unique photographic challenges and rewards, showcasing the dynamic interplay between ice, water, and land.Techniques for Photographing Braided Rivers and Powerful Meltwater Streams
Glacial rivers in Iceland are often characterized by their intricate braided patterns, especially when seen from a higher vantage point.- Aerial Perspective (Drones): Where permitted and safe, drones are invaluable for capturing the complex, abstract beauty of braided rivers. The patterns and colors (often milky grey or turquoise due to glacial flour) are best appreciated from above.
- Leading Lines: Even from ground level, use the natural flow and channels of the river as leading lines to guide the viewer's eye through the frame, creating depth and movement.
- Long Exposures: As with glacier lagoons, long exposures (using ND filters) can transform powerful meltwater streams into silky, ethereal flows. Experiment with shutter speeds from 1/2 second to several seconds to find the desired effect, emphasizing the water's movement while blurring out harsh textures.
- Reflections: Look for moments of calm water where reflections of the sky or surrounding mountains can add an extra layer of interest to your composition.
- Detail Shots: Don't forget to get close to capture the textures of the water, the small pebbles, or the interactions between water and ice chunks.
Using Reflections and Leading Lines in Water Features
Reflections and leading lines are powerful compositional tools that are abundant in glacial water landscapes:- Reflections: From still pools formed by meltwater to the broader surfaces of rivers, reflections can add symmetry, color, and a sense of calm to your images. Shoot at dawn or dusk when the wind is often minimal for the best reflections.
- Leading Lines: The natural flow of water, the edges of riverbanks, or even patterns in wet sand can all serve as strong leading lines. Use them to draw the viewer's gaze towards a focal point, such as a distant glacier or mountain peak.
Capturing the Scale and Drama of Outwash Plains (Sandurs)
Outwash plains, or sandurs, are vast, flat plains of black volcanic sand and gravel deposited by glacial meltwater. They often appear stark, desolate, yet possess a haunting beauty.- Sense of Scale: The sheer emptiness of a sandur can be overwhelming. Use a distant mountain, a vehicle, or a lone figure (if available) to convey the immense scale and isolation of these landscapes.
- Contrast: The black sand provides a dramatic contrast to any patches of snow, ice, or distant green moss. Look for these contrasts to create visual interest.
- Minimalist Compositions: Sandurs lend themselves well to minimalist photography. Focus on simple compositions, emphasizing lines, textures, and the vastness of the space.
- Weather Drama: Overcast skies, dramatic clouds, or approaching storms can enhance the mood and drama of an outwash plain, transforming it into a powerful, evocative scene.
Seasonal Variations and Their Impact on River Photography
The appearance and character of glacial rivers and meltwater streams vary significantly with the seasons:- Summer (June-August): Meltwater flow is at its peak due to warmer temperatures, leading to powerful, wide rivers. The water often carries a lot of glacial flour, giving it a milky, sometimes turquoise, appearance. Braided patterns are most prominent.
- Autumn (September-October): Flow starts to decrease, and surrounding vegetation might add touches of autumn color to the banks, offering a different palette.
- Winter (November-May): Meltwater flow is significantly reduced, and many smaller streams might freeze over. The landscape is often covered in snow, creating stark black and white scenes with frozen riverbeds. Some larger rivers might still flow but with
Frequently Asked Questions
Do you need a guide to photograph a glacier or ice cave in Iceland?
Yes. Do not walk onto a glacier or into an ice cave without a certified guide. Glaciers move constantly and hide crevasses, moulins and unstable ice, and natural ice caves can collapse. A qualified guide brings the crampons, ropes and current knowledge of conditions that change day to day. The lagoon shorelines and Diamond Beach, by contrast, are shot from safe ground.
What exposure settings work for bright glacial ice?
Overexpose. A camera meter renders a bright scene as middle grey, so ice and snow come out dull without help — dial in roughly +1 to +2 stops of exposure compensation so white reads as white. Then check the histogram rather than the screen: push it to the right, but stop short of clipping the highlights, because blown ice has no detail to recover.
When is the best time of day to photograph Jökulsárlón?
Golden hour and blue hour. Low sun puts warm orange and pink light on the icebergs and can give you reflections on calm water; early morning also means fewer people. Blue hour, just before sunrise and after sunset, deepens the natural blue of the ice and suits quieter, moodier frames. In winter the same location doubles as an aurora foreground.
Can you fly a drone over Iceland's glacier lagoons?
Sometimes, and never assume. Drone rules in Iceland are set by the Icelandic Transport Authority, and protected areas, national parks and anywhere near people or wildlife carry their own restrictions and no-fly zones. Check the current rule for the specific lagoon before you launch — the answer differs by site and has changed more than once.
Which lenses should you bring for glacier photography?
A wide-angle in the 14-24 mm or 16-35 mm range for ice walls and the scale of the lagoons, a 24-70 mm as the general workhorse, and a telephoto to isolate iceberg detail and the seals that haul out in the lagoons. Prioritise a weather-sealed body and lenses: spray, blowing grit and rain are the normal working conditions here, not the exception.