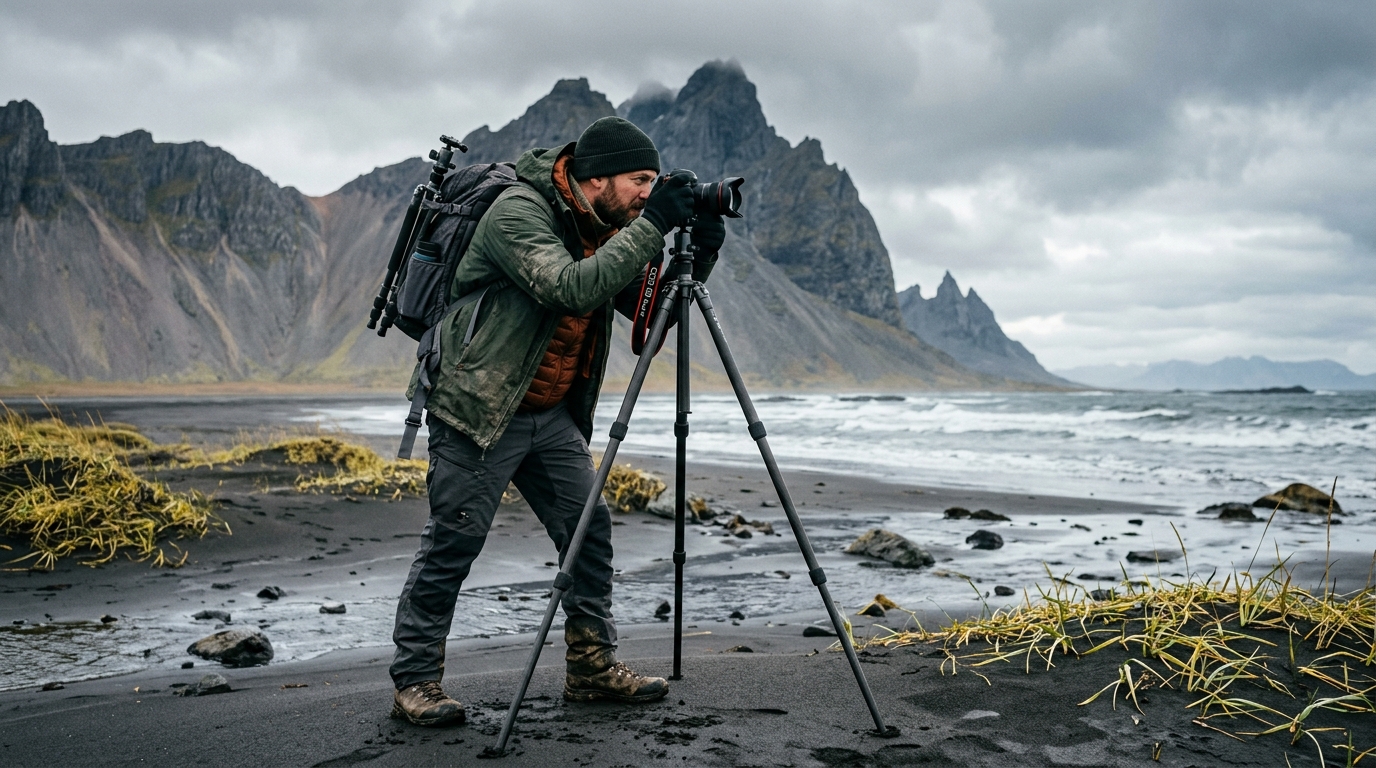
To thrive in the sub-arctic environment, mastering your Iceland photography clothing layers is the single most important technical preparation you can make to ensure you remain on location long enough to capture the perfect shot. By utilizing a systematic layering strategy—base, mid, and outer—you can maintain core body temperature despite the island’s notorious microclimates, where wind, rain, and freezing temperatures can shift within minutes.
Why Your Choice of Iceland Photography Clothing Layers Matters
Iceland’s weather is famously volatile, with the Icelandic Met Office recording rapid shifts in wind speed and precipitation that can catch unprepared travelers off guard. For photographers, the challenge is compounded by the nature of the craft: landscape photography often requires long periods of static activity. Unlike hiking, where constant movement generates significant body heat, standing still behind a tripod at a site like Dettifoss means your metabolic heat production drops, making you highly susceptible to the cold. The primary goal of your layering system is moisture management. When you hike to a remote location, your body produces sweat; if that moisture remains trapped against your skin, it will conduct heat away from your body once you stop to set up your gear, leading to rapid chilling. Proper Iceland photography clothing layers allow for "venting"—the ability to unzip or remove layers as your exertion level changes—ensuring you stay dry throughout the entire shoot. According to the National Park Service, managing moisture is a critical component of preventing hypothermia in cold-weather environments.The Foundation: Selecting the Best Base Layers for Iceland
The base layer is your "second skin." Its function is twofold: to wick moisture away from the skin and to provide a thin, insulating barrier. In Iceland, the gold standard for base layers is merino wool. According to The Woolmark Company, merino wool is naturally breathable and capable of managing moisture vapor before it turns into liquid sweat, which is critical for maintaining comfort during intense photography sessions. Why You Must Avoid Cotton: Cotton is the enemy of the sub-arctic photographer. It is a hydrophilic fiber, meaning it absorbs water and holds it against your skin. Once wet, cotton loses all insulating properties and dries extremely slowly. In the damp environment of the South Coast, wearing cotton can lead to rapid heat loss if you become wet from rain or waterfall spray. Weight Recommendations by Season:- Summer (June–August): Lightweight merino wool (150g/m²). This provides enough warmth for breezy mornings without overheating you during steep climbs.
- Shoulder Seasons (May/September): Mid-weight merino wool (200g/m²).
- Winter (October–April): Heavy-weight or expedition-weight merino wool (250g/m² or higher). Many professionals opt for a long-sleeve top and thermal leggings to ensure total coverage.
Mid-Layers: Insulation for Long Exposure Sessions
Your mid-layer is the "engine room" of your thermal system. Its job is to trap the heat your body generates. For stationary photography, you need high-loft insulation that doesn't restrict your range of motion.- Fleece (Synthetic): Excellent for active movement. It is highly breathable and continues to insulate even if it becomes slightly damp from humidity.
- Down (Natural): Provides the best warmth-to-weight ratio. However, standard down loses its loft and insulating power when wet. If you choose down, look for "hydrophobic" treated down or a synthetic alternative like PrimaLoft, which mimics down’s structure but performs better in Iceland’s wet conditions. Source: Vedur source.
Outer Shells: Essential Waterproof Photography Gear Clothing
Your outer shell is the final line of defense against the elements. When searching for waterproof photography gear clothing, prioritize shells that feature a high-performance membrane like Gore-Tex or similar proprietary technologies that offer a balance of waterproof protection and breathability. A professional-grade shell for Iceland should include:- Helmet-Compatible Hood: Even if you aren't climbing, these hoods are larger and provide better coverage against driving rain and horizontal snow.
- Pit Zips: Essential for dumping excess heat during steep approaches to locations like Dynjandi.
- Reinforced Shoulders: If you carry a heavy camera backpack, look for shells with abrasion-resistant panels to prevent the fabric from wearing thin under the straps.
Extremities and Accessories: Protecting Your Hands and Feet
Your hands are your most vulnerable tools. Standard gloves are often too thick for operating camera buttons. We recommend a "liner and shell" system: thin, touch-screen compatible merino liners worn underneath heavy-duty waterproof mittens that can be flipped back to expose your fingers. Footwear is equally critical. You are likely to encounter everything from mossy, wet rocks to jagged, uneven lava fields. A stiff-soled, waterproof hiking boot with high ankle support is mandatory. Pair these with high-quality wool socks (avoiding cotton blends entirely). On long days, carry an extra pair of socks in a waterproof dry bag inside your camera pack—changing into dry socks at midday can drastically improve your mood and ability to focus on your composition.Adapting Your Apparel for Specific Iceland Locations
Different regions of Iceland require subtle adjustments to your layering kit.- Waterfall Spray Zones: At sites like Dettifoss or Dynjandi, the mist is constant. Even if it isn't raining, you will get soaked. Here, a full set of waterproof overtrousers (hardshell pants) is non-negotiable. Wear them over your standard hiking trousers to keep your base layers dry.
- Coastal Lighthouses: At exposed locations like Dyrhólaey, the wind is the primary threat. Wind chill can drop the "feels like" temperature significantly. Ensure your outer shell is fully windproof and that your mid-layer is zipped tight to prevent "drafting."
- The Highlands: If you are venturing into the interior, expect temperatures to be significantly lower than on the coast. Pack an extra "emergency" layer—a heavy down jacket that can be thrown over all your other layers—for those moments when you are waiting for the light to hit a mountain peak and the temperature plummets. Source: Batteryuniversity source.