Iceland, a land forged by fire and ice, offers a spectacle that extends far beyond its famed glaciers, volcanoes, and the dancing Northern Lights. For the dedicated photographer, the island's night sky presents an unparalleled canvas, a realm where celestial wonders meet dramatic Earthly landscapes. While the aurora borealis justly commands attention, the true depth of Iceland's astrophotography potential lies in its incredibly dark skies, allowing for breathtaking captures of the Milky Way, intricate star trails, and distant galaxies.
In 2026, as photographers increasingly seek unique and challenging locations, Iceland stands out as a premier destination for those looking to push their night sky photography skills. This guide delves into the specifics of Iceland astrophotography, moving past the common aurora chase to reveal how you can capture the profound beauty of our galaxy and beyond. From essential gear and optimal timing to mastering advanced techniques and discovering the best dark sky locations, we'll equip you with the knowledge to create truly iconic images of Iceland's nocturnal majesty.
Understanding Iceland's Night Sky: What Makes it Special for Astrophotography?
Iceland’s geographical position and sparse population density create an environment uniquely suited for night sky photography. The island is renowned globally for its exceptionally low light pollution across vast areas, making it a prime location for viewing celestial phenomena. This lack of artificial skyglow means that even faint stars and the intricate dust lanes of the Milky Way are visible to the naked eye, let alone a camera sensor. Organizations like Dark Sky International advocate for preserving such pristine night environments.
The seasonal variations play a critical role in planning your Iceland astrophotography guide. During the summer months, from late May to mid-August, Iceland experiences the "midnight sun," where daylight persists for nearly 24 hours. While stunning for landscape photography, this period is entirely unsuitable for deep-sky astrophotography. Conversely, the winter months, roughly from October to March, offer extended periods of darkness, with some regions experiencing true night for 18-20 hours a day around the winter solstice. This extended darkness provides ample opportunity for long exposures and multiple compositions.
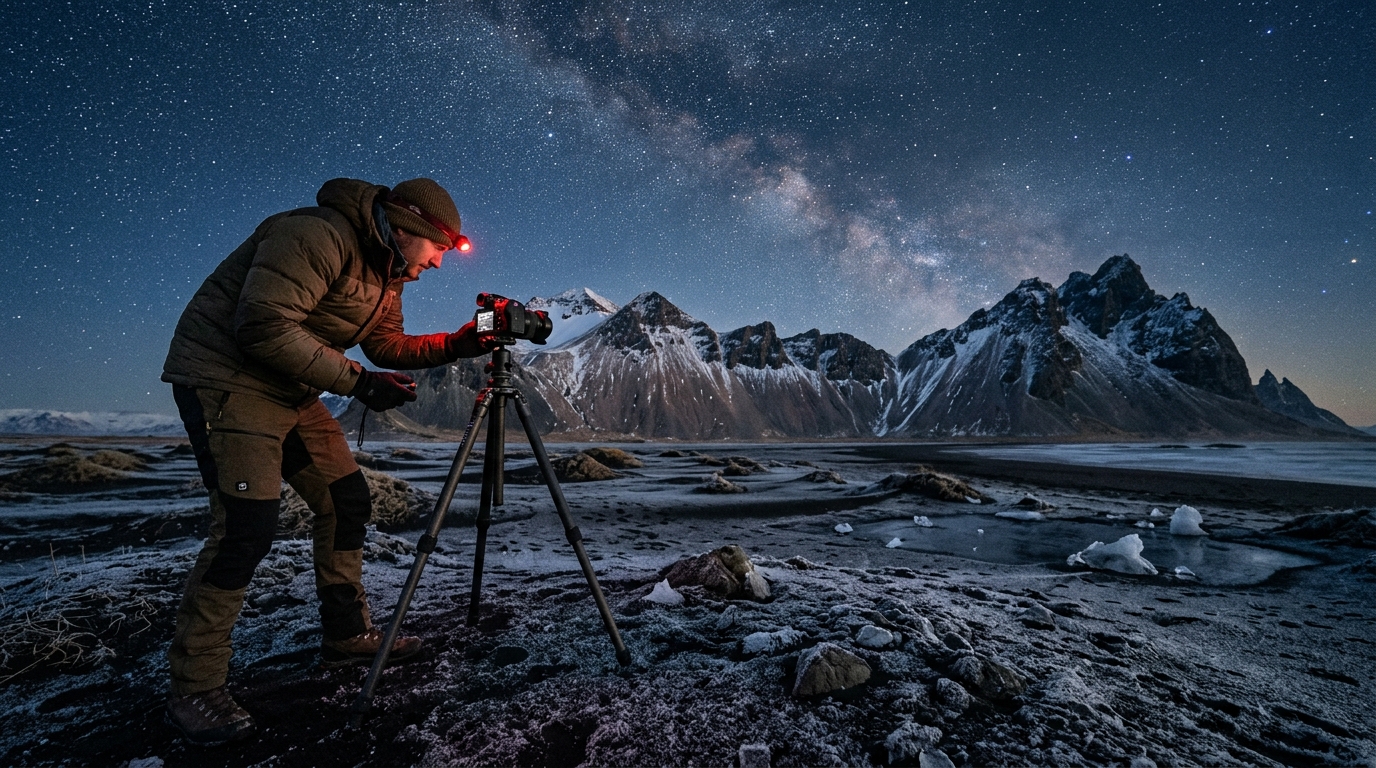
What truly elevates Iceland for astrophotography, however, is the unparalleled combination of dark skies with its unique geological formations. Imagine the Milky Way arching over the basalt columns of Reynisfjara, the iconic peak of Kirkjufell perfectly framed beneath a tapestry of stars, or the glacial lagoons reflecting a cosmic display. These dramatic foreground elements, from black sand beaches and towering waterfalls to ancient lava fields and quaint churches, provide endless compositional possibilities that are rare to find elsewhere in such abundance. For photographers, this means every night sky shot can be imbued with a distinctive sense of place.
It's important to differentiate between aurora photography and deep-sky/Milky Way photography in Iceland. While the Northern Lights are a spectacular natural phenomenon, they are transient and can often be so bright that they overpower the fainter details of the Milky Way or distant nebulae. Dedicated astrophotography often requires conditions where the aurora is absent or very subtle, allowing the camera to capture the delicate structures of the galaxy without interference. This guide focuses on the latter, helping you capture the static, yet infinitely complex, beauty of the stars themselves.
Essential Gear for Capturing Iceland's Night Sky
Successfully capturing the faint light of distant stars and galaxies requires specific equipment designed for low-light performance and stability. Investing in the right gear is paramount for your Iceland astrophotography adventure.
- Camera Body:
- Full-frame vs. APS-C: While excellent results can be achieved with modern APS-C sensors, full-frame cameras generally offer superior high ISO performance, producing cleaner images with less noise. Models like the Sony a7S series, Canon EOS R5/R6, Nikon Z6/Z7, or older DSLR equivalents (e.g., Canon 5D Mark IV, Nikon D850) are ideal due to their larger pixels and excellent dynamic range.
- High ISO Performance: Look for cameras renowned for their ability to handle high ISO settings (e.g., ISO 3200-6400 or even higher) with minimal noise. This is critical for gathering enough light in short exposures to avoid star trailing.
- Lenses:
- Fast Wide-Angle Lenses: This is arguably the most crucial piece of equipment. You need a lens with a wide aperture (f/2.8 or faster) to collect as much light as possible, and a wide focal length (14-24mm on full-frame, or equivalent on APS-C) to capture a broad expanse of the sky and foreground. Popular choices include the Sigma 14-24mm f/2.8 Art, Sony 14mm f/1.8 GM, Nikon Z 14-24mm f/2.8 S, or manual focus options like the Laowa 15mm f/2 or Samyang/Rokinon 14mm f/2.8.
- Manual Focus Ring: A lens with a clear and precise manual focus ring is essential, as autofocus systems struggle in extreme darkness.
- Tripod:
- Sturdy and Stable: Iceland is notorious for strong winds, especially during winter. A robust, heavy-duty tripod is non-negotiable to prevent camera shake during long exposures. Carbon fiber tripods offer a good balance of stability and portability. Consider adding a weight to the center column for extra stability in high winds.
- Accessories:
- Remote Shutter Release: Wired or wireless, a remote shutter release is vital to avoid camera shake when pressing the shutter button. This is especially important for multi-shot techniques like star stacking or panoramas.
- Extra Batteries: Cold weather severely drains battery life. Carry at least 2-3 spare batteries, kept warm in an inside pocket until needed.
- Headlamp with Red Light Mode: A headlamp is essential for navigating in the dark, but a red light mode preserves your night vision and is less disruptive to other photographers.
- Lens Warmers/Dew Heaters: Condensation and frost can quickly form on your lens in cold, humid Icelandic conditions. A USB-powered lens warmer or dew heater can be a lifesaver, keeping your lens clear throughout the night.
- Microfiber Cloths: For wiping away any moisture or smudges.
- Power Bank: For charging lens warmers, phones, or even camera batteries (if your camera supports USB charging).
- Intervalometer: For capturing star trails or time-lapses, a built-in or external intervalometer is necessary.
- Personal Gear:
- Warm, Waterproof, Windproof Clothing: Layering is key. Think thermal base layers, a warm fleece or down mid-layer, and a waterproof/windproof outer shell.
- Insulated Boots: With thick, warm socks. Standing still for hours in freezing temperatures can quickly lead to cold feet.
- Hat, Gloves, Buff: Protect extremities from the biting cold. Mittens with finger flaps are great for operating camera controls.
- Hand Warmers: Disposable or rechargeable hand warmers can be placed in gloves or pockets for extra comfort.
- Hot Beverage: A thermos of hot tea or coffee can be a welcome companion during long, cold nights.
Best Times and Conditions for Iceland Astrophotography
Timing and conditions are everything when it comes to successful night sky photography in Iceland. Getting these elements right will dramatically increase your chances of capturing stunning images.
- Seasonal Timing: Winter Months (October-March) As discussed, the long periods of darkness make Iceland's winter the undisputed best time for astrophotography. While you might encounter more challenging weather (snow, strong winds, ice), the reward is maximum darkness and often, clearer, crisper air. The shoulder months of October/November and February/March are often considered for their balance of decent darkness and potentially slightly milder conditions compared to deep winter, though extreme cold is often a possibility.
- Moon Phases: New Moon for Optimal Milky Way Visibility
The moon is the biggest source of natural light pollution. For capturing the faint details of the Milky Way, particularly the galactic core, you absolutely want to shoot during the new moon phase (the week surrounding the new moon). This ensures the darkest possible skies, allowing your camera to pick up the most subtle light from distant stars and nebulae.
However, a thin crescent moon (early waxing or late waning) can be beneficial. A small amount of moonlight can subtly illuminate your foreground, adding definition and interest without overpowering the stars. While experimenting with different moon phases can reveal unique creative possibilities, prioritizing the new moon is generally recommended for optimal deep-sky work.
- Weather Considerations: Clear Skies are Paramount
Clouds are the ultimate enemy of astrophotography. Even a thin layer of high cloud can obscure the stars. Before heading out, meticulously check weather forecasts for cloud cover, wind speed, and temperature. We recommend using the Icelandic Met Office (Veðurstofa Íslands) website for the most accurate and up-to-date forecasts. Look for forecasts that predict "clear skies" or "partly cloudy" with minimal cloud cover percentages.
Wind is also a major factor. High winds will make it impossible to get sharp images, even with a sturdy tripod. Aim for nights with minimal wind speeds if possible. Be prepared for sudden weather changes; Iceland's weather is famously unpredictable.
- Aurora Activity: Balancing with Deep-Sky Goals
While often seen together, intense aurora activity can sometimes be too bright for delicate Milky Way shots. If your primary goal is the Milky Way, monitor aurora forecasts (e.g., via SpaceWeatherLive.com or similar apps) and consider choosing nights with lower Kp-index predictions. If the aurora is out, you can still compose your shots to include it, but be mindful that the exposure settings for aurora are often different than for the Milky Way, requiring quicker shutter speeds to freeze the aurora's movement.
- Understanding Astronomical Twilight and True Night
True night, or astronomical night, is when the sun is more than 18 degrees below the horizon. This is the period when the sky is darkest and most suitable for astrophotography. Before and after this, you have astronomical twilight, nautical twilight, and civil twilight, each progressively brighter. Use apps like PhotoPills or Stellarium to determine the exact times of astronomical night for your specific location and date in Iceland, ensuring you maximize your shooting window.
Mastering Astrophotography Techniques in Iceland
Beyond gear and timing, mastering specific photographic techniques is essential for capturing the magic of Iceland's night sky.
- Camera Settings: The Foundation of Night Photography
- Aperture: Wide Open (f/2.8 or faster)
For night photography, it is generally recommended to use your lens at its widest aperture (e.g., f/2.8, f/1.8 or faster). This allows the maximum amount of light to reach your sensor in the shortest possible time, which is crucial for capturing faint stars and avoiding star trails.
- ISO: High, but Manage Noise (ISO 3200-6400)
Start with ISO 3200 or 6400. The goal is to gather enough light without introducing excessive noise. Modern full-frame cameras can often handle ISO 6400 or even 12800 with manageable noise, especially when paired with good post-processing techniques. Test your camera's limits before your trip.
- Shutter Speed: The 500 Rule / NPF Rule
To avoid star trailing (where stars appear as streaks due to Earth's rotation), you need to calculate your maximum shutter speed. The traditional "500 Rule" states: 500 / (Focal Length x Crop Factor) = Max Shutter Speed in seconds. For a full-frame camera with a 14mm lens, this is 500 / 14 ≈ 35 seconds. For an APS-C camera with a 10mm lens (1.5x crop factor), this is 500 / (10 x 1.5) ≈ 33 seconds.
A more accurate but complex "NPF Rule" (Nikon, Pentax, Fuji) considers pixel pitch and aperture, typically resulting in shorter recommended shutter speeds (e.g., 20-25 seconds for 14mm). Generally, aim for shutter speeds between 15-30 seconds to keep stars sharp, adjusting based on your focal length and desired star sharpness.
- Aperture: Wide Open (f/2.8 or faster)
- Focusing in the Dark: Precision is Key
- Manual Focus: Autofocus is unreliable in the dark. Switch your lens to manual focus.
- Live View Magnification: Use your camera's Live View mode and zoom in to the brightest star you can find. Carefully adjust the focus ring until the star is as small and sharp as possible.
- Hyperfocal Distance: For landscapes with close foreground elements, consider setting your lens to its hyperfocal distance. This ensures maximum depth of field from foreground to infinity. Apps like PhotoPills can calculate this for you.
- Focus Peaking: Some mirrorless cameras offer focus peaking, which highlights in-focus areas, making manual focusing easier.
- Composition: Incorporating Iceland's Iconic Landscapes as Foregrounds
The true magic of Iceland astrophotography lies in combining the celestial with the terrestrial. Don't just point your camera at the sky. Seek out strong foreground elements to anchor your composition. Think about leading lines, natural frames, and the rule of thirds.
- Mountains: The dramatic peaks of Vestrahorn or Kirkjufell provide incredible silhouettes against the starry sky.
- Waterfalls: Capture the movement of water while the stars stand still. Locations like Seljalandsfoss or Skogafoss offer unique opportunities.
- Churches: Quaint Icelandic churches, such as Búðakirkja (the Black Church) or the turf church in Víðimýri, make for compelling, human-scale elements under the vast night sky.
- Basalt Columns & Beaches: Reynisfjara's basalt columns or the icebergs at Jökulsárlón offer striking textures and forms.
- Milky Way Photography: Techniques for Capturing the Galactic Core
The galactic core of the Milky Way is the brightest and most visually interesting part. In Iceland, during the winter months, the core is visible low on the horizon, arching across the sky. Use a wide-angle lens, fast aperture, high ISO, and a shutter speed determined by the 500/NPF rule. Consider shooting multiple frames for stacking or panoramas to enhance detail and reduce noise.
- Star Trails: Long Exposure vs. Stacking Multiple Shorter Exposures
- Single Long Exposure: You can achieve star trails with a single very long exposure (e.g., 30 minutes to several hours), but this increases sensor noise significantly and requires specific camera capabilities.
- Stacking Multiple Shorter Exposures: This is the preferred method. Take numerous shorter exposures (e.g., 30 seconds each) back-to-back using an intervalometer. Later, stack these images in software like StarStax or Photoshop to create smooth, noise-free star trails. This method offers more flexibility and better image quality.
- Light Painting: Subtle Illumination of Foregrounds
Sometimes, your foreground can be too dark. Light painting allows you to selectively illuminate elements. Use a low-powered LED flashlight (preferably with adjustable brightness) and "paint" light onto your foreground during a long exposure. Be subtle – a little light goes a long way. Avoid harsh, direct light, and be mindful of other photographers in the area.
Top Locations for Astrophotography in Iceland
Iceland is replete with incredible locations for night sky photography. The key is to find spots with minimal light pollution and compelling foregrounds. Our Iceland Photo Maps are an invaluable resource for this, pinpointing precise locations and their unique features.
- Identifying Dark Sky Locations: Using Light Pollution Maps
Before you even pack your bags, consult light pollution maps (e.g., LightPollutionMap.info). You'll notice that most of Iceland, particularly the interior highlands, the Snaefellsnes Peninsula, the Westfjords, and much of the South and East Coasts, are Bortle Class 1-3 (excellent to good dark skies). Avoid the immediate vicinity of Reykjavík and Akureyri.
- Iconic Spots with Minimal Light Pollution:
- Jökulsárlón Glacier Lagoon & Diamond Beach: The icebergs, both in the lagoon and washed ashore on the black sand, provide incredible foregrounds. The open sky over the Atlantic offers expansive views of the Milky Way. Find this location and more on our Landscape Map.
- Vestrahorn (Stokksnes): Often called "Batman Mountain," Vestrahorn's dramatic peaks and black sand dunes are a dream for nightscapes. The reflections in the shallow water can double the celestial beauty.
- Kirkjufell (Grundarfjörður): The "Church Mountain" with its accompanying waterfall is one of Iceland's most photographed landmarks. Under a starry sky, it transforms into an otherworldly scene.
- Reynisfjara Black Sand Beach: The basalt columns, Reynisdrangar sea stacks, and powerful waves offer a dramatic and often moody foreground for the night sky.
- Hidden Gems: How to Use Maps to Find Remote, Less-Trafficked Areas
While iconic spots are popular for a reason, Iceland also offers countless lesser-known locations. Utilize detailed topographical maps and our locations database to scout for remote areas away from main roads and settlements. Look for isolated cabins, unique rock formations, or small waterfalls that can serve as unique foregrounds. Always check accessibility, especially in winter.
- Regional Considerations:
- South Coast: Offers easy access to many iconic spots (Reynisfjara, Jökulsárlón) but can also be more crowded.
- Snaefellsnes Peninsula: Known as "Mini Iceland," it packs diverse landscapes into a smaller area, including Kirkjufell, Lóndrangar, and the Budakirkja church, all excellent for night photography.
- East Fjords: Remote and less visited, offering pristine dark skies and dramatic fjord landscapes. Access can be challenging in winter.
- Westfjords: The most remote region, boasting some of the darkest skies imaginable, but also the most challenging to navigate in winter.
Post-Processing Your Iceland Night Sky Images
Capturing the image is only half the battle; post-processing is where you truly bring out the hidden details and beauty of your astrophotography shots.
- Basic Adjustments: White Balance, Exposure, Contrast
Start with correcting your white balance. Night sky images often benefit from a cooler white balance (around 3500-4500K) to bring out the blues and purples of the sky. Adjust exposure, shadows, and highlights to balance the foreground and sky. Increase contrast to make the stars pop.
- Noise Reduction Techniques: Luminance and Color Noise Reduction
High ISO images inevitably have noise. Apply luminance noise reduction to smooth out graininess and color noise reduction to eliminate colored speckles. Be careful not to overdo it, as excessive noise reduction can lead to a "plastic" look and loss of star detail. Modern software like Adobe Lightroom, Photoshop, or specialized noise reduction plugins (e.g., Topaz Denoise AI) are highly effective.
- Enhancing the Milky Way: Clarity, Dehaze, Local Adjustments
To make the Milky Way stand out, use tools like Clarity and Dehaze (in Lightroom/ACR) sparingly. These can add punch and definition to the galactic core. For more control, use local adjustment brushes or radial filters to selectively enhance brightness, contrast, and sharpness within the Milky Way band, leaving the surrounding sky untouched.
- Star Stacking: Software and Workflow for Reducing Noise and Enhancing Stars
For the cleanest, most detailed images, stack multiple exposures. Software like DeepSkyStacker (free), PixInsight (paid), or even Photoshop can align and average multiple frames. This process significantly reduces noise and brings out fainter details in the stars and Milky Way. The workflow typically involves:
- Import all exposures into stacking software.
- Align the images (the software does this automatically).
- Stack the images (averaging or median stacking are common methods).
- Export the stacked image (usually a TIFF) for further processing in Lightroom/Photoshop.
- Panorama Stitching for Wider Nightscapes To capture an even wider view of the night sky and landscape, shoot a panorama. Take multiple overlapping vertical or horizontal shots, ensuring each frame overlaps by 30-many. Stitch these together in Lightroom, Photoshop, or dedicated panorama software. This is particularly effective for capturing the entire arc of the Milky Way or a sweeping Icelandic vista.
Safety and Ethical Considerations for Night Photography in Iceland
Iceland's raw beauty comes with inherent risks, especially when venturing out at night in winter. Prioritizing safety and respecting the environment are paramount.
- Weather Preparedness: Sudden Changes, Extreme Cold, Wind Icelandic weather can change dramatically within minutes. often check forecasts, but be prepared for the unexpected. Dress in layers, carry extra warm clothing, and understand the signs of hypothermia. Wind chill can make even moderately cold temperatures feel dangerously frigid. rarely underestimate the power of Icelandic storms.
- Driving in Darkness: Road Conditions, Wildlife, Parking Safely Driving in Iceland at night, especially in winter, requires extreme caution. Roads can be icy, snowy, or gravel, and visibility can be poor. Be aware of hidden potholes, sheep, or reindeer on the roads. often pull over completely and safely off the road when stopping to photograph. Use your hazard lights. rarely stop on blind curves or in the middle of the road.
- Respecting Nature: Stay on Marked Paths, Leave No Trace Principles Iceland's delicate ecosystem is easily damaged. often stick to marked paths and trails. Do not walk on moss, lava fields, or fragile vegetation. Pack out everything you pack in, including all trash. Leave no trace of your visit. This means not disturbing wildlife, picking flowers, or moving rocks.
- Private Property: Be Aware of Land Ownership Many seemingly wild areas in Iceland are privately owned. often be aware of signs indicating private land. If in doubt, assume it's private or stick to well-known public access points. Ask for permission if you wish to photograph on private property.
- Aurora Etiquette: Be Mindful of Other Photographers and Light Sources
When photographing at popular spots, be considerate of others. Avoid using bright white headlamps or camera screens that can ruin other photographers' long exposures. If you must use a light, use the red light mode on your headlamp. Keep conversations quiet. Everyone is there to enjoy the quiet majesty of the night.
Conclusion: Your Journey to Stunning Iceland Astrophotography
Iceland offers an unparalleled stage for astrophotography, a place where the grandeur of the cosmos meets the raw, untamed beauty of our planet. Moving beyond the allure of the Northern Lights, the opportunity to capture the Milky Way, intricate star trails, and deep-sky wonders against Iceland's dramatic landscapes is a photographer's dream.
We've covered the essential elements: understanding Iceland's unique night sky, equipping yourself with the right gear, mastering crucial techniques, identifying the best locations, and processing your images to perfection. But remember, the most vital ingredients are patience, perseverance, and a deep appreciation for the natural world.
Your journey to stunning Iceland astrophotography will be filled with challenges—the cold, the wind, the unpredictable weather—but the rewards are immeasurable. Each successful capture is a testament to your dedication and a unique piece of art that fuses Earth and sky. So, embrace the darkness, brave the elements, and let Iceland's celestial wonders ignite your photographic passion. The night sky over this incredible island is waiting to be explored through your lens.
Frequently Asked Questions
When is the absolute best time of year for astrophotography in Iceland?
The absolute best time for astrophotography in Iceland, particularly for the Milky Way and general deep-sky objects, is during the darkest winter months, specifically from late October through early March. During this period, Iceland experiences significantly longer nights, offering more hours of true darkness. Within this window, aim for the week surrounding the new moon to minimize light pollution from the moon itself, ensuring the faintest celestial details are visible.
Do I need special permits to photograph at night in Iceland?
Generally, you do not need special permits for night photography in most public areas of Iceland, including national parks and popular tourist sites, as long as you stay on marked paths and respect the environment. However, some specific locations might have restricted access or require permits, especially if you plan to venture onto private land or into certain protected nature reserves. often check local regulations for your chosen locations and be mindful of private property signs. When in doubt, assume an area is private or stick to clearly designated public access points.
Can I do astrophotography if the Northern Lights are out?
Yes, you absolutely can, but it requires careful balancing of your goals. If the Northern Lights are very strong, they can be so bright that they overpower the fainter details of the Milky Way or other deep-sky objects. For dedicated Milky Way photography, conditions with no or very subtle aurora are often preferred. However, you can certainly compose shots that include both the aurora and a starry sky. You might need to adjust your shutter speed to be slightly faster to "freeze" the aurora's movement, which could mean increasing your ISO further to compensate for the reduced exposure time. It's an artistic choice whether to prioritize the aurora's dynamism or the Milky Way's intricate details.
What are common mistakes beginners make when shooting the night sky in Iceland?
Beginners often make several common mistakes: 1) Not dressing warmly enough: Iceland's cold is intense, leading to discomfort and premature ending of shoots. 2) Forgetting extra batteries: Cold drains batteries rapidly. 3) Not checking weather forecasts meticulously: Clouds are the enemy, and sudden storms are common. 4) Failing to achieve sharp focus: Manual focus in the dark is tricky; practice before you go. 5) Overlooking foregrounds: The unique landscapes are what make Icelandic nightscapes special. 6) Using too much light: Bright headlamps or phone screens ruin night vision and other photographers' shots. 7) Ignoring the moon phase: Shooting a full moon will wash out the Milky Way.
How do I protect my gear from the cold and moisture during night shoots?
Protecting your gear is crucial in Iceland's harsh environment. 1) Lens Warmers/Dew Heaters: These are essential to prevent condensation and frost on your lens. 2) Keep Batteries Warm: Store spare batteries in an inside pocket close to your body heat. 3) Camera Bag Protection: Use a weather-sealed camera bag. When moving from cold to warm environments, place your camera (still in its bag) into a plastic bag and seal it. Let it warm up slowly to room temperature to prevent condensation from forming inside the camera. 4) Microfiber Cloths: often have several clean cloths to wipe away any moisture. 5) Rain Covers: Even if it's not raining, a rain cover can offer an extra layer of protection against wind-blown snow or moisture.
Ready to plan your astrophotography adventure? Explore our Iceland Photo Maps to discover the perfect dark sky locations for your next shot!