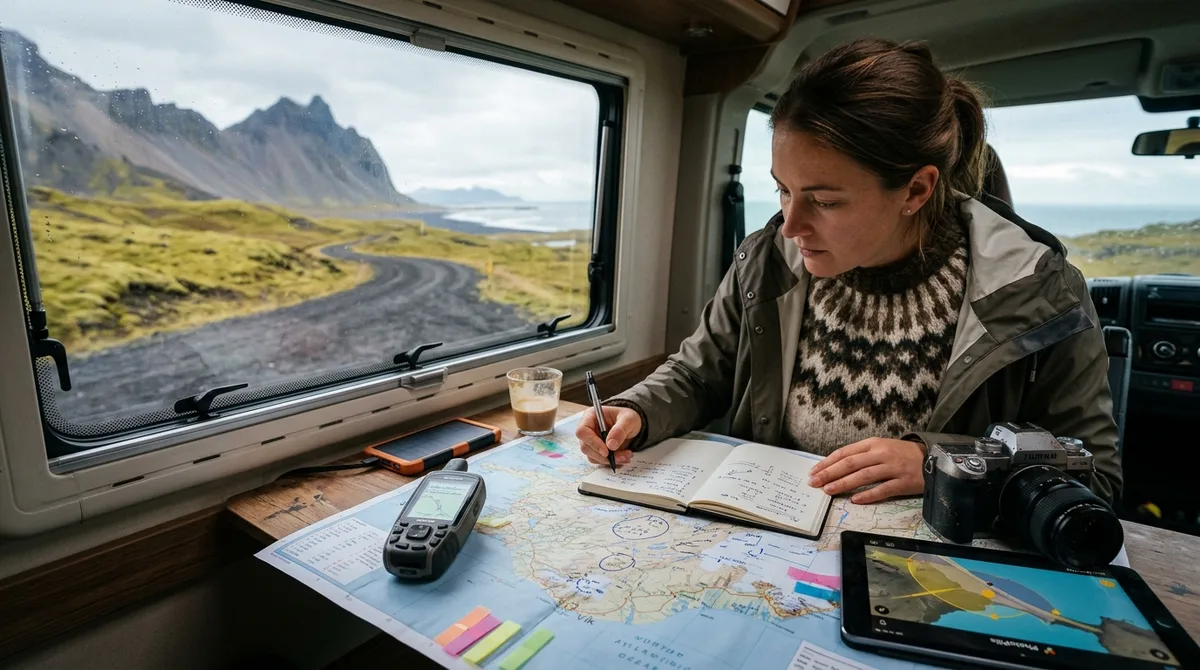
Establishing a rigorous Iceland photography location scouting workflow before departure is the most reliable way to convert volatile subarctic light into precise, high-caliber landscape compositions. Rather than burning valuable shooting hours searching for parking turnouts or arriving at sea stacks during full shadow, pre-trip spatial planning allows landscape photographers to align solar azimuths, assess micro-topography, and import offline waypoints long before setting foot on the island.
Iceland’s subarctic environment presents environmental and operational challenges that make traditional on-the-ground scouting highly inefficient. Weather systems move rapidly across the North Atlantic, pushing severe wind fronts, low cloud ceilings, and squalls over coastal fjords within minutes. When an operational light window opens—whether it is a short burst of side-lighting through a storm break or an extended shoulder-season golden hour—you must already know your exact camera position, elevation profile, walking approach, and alternate angles. Integrating remote spatial analysis, solar calculations, and structured offline mapping into your landscape photography planning shifts your trip from reactive driving to deliberate execution.
The Reality of Scouting Remote Subarctic Landscapes
Landscape photographers visiting Iceland often overestimate their ability to scout locations upon arrival. In mid-latitude environments, driving up to a ridge or walking a short trail to evaluate compositions is a standard practice. In Iceland, several geographical factors break this approach:
- Subarctic Weather Volatility: Microclimates created by ice caps like Vatnajökull and Langjökull produce localized weather patterns. Heavy precipitation, severe winds, or dense cloud caps can completely obscure a mountain peak while a few kilometers away the sky remains clear. Physical scouting during severe conditions wastes energy and precious daylight.
- Narrow Daylight & Rapid Sun Trajectories: During mid-winter, daylight is extremely limited, demanding precise timing. In mid-summer, continuous daylight creates a 360-degree sweep of low-angle light, but the sun’s azimuth shifts rapidly around the horizon. Lacking a precise target means missing the ideal light window while navigating gravel roads.
- Terrain Accessibility Constraints: Volcanic ash plains, unbridged glacial rivers, fragile moss fields, and protected nature reserves restrict free movement. Leaving designated trails damages tundra environments and can incur severe fines. You cannot simply walk around to find a better angle without knowing trail networks and private property boundaries beforehand.
Deliberate landscape photography requires pre-visualizing compositions: selecting a focal length that balances foreground detail against background scale, calculating when light clears a ridge line, and knowing precisely where to position your tripod before sunrise or sunset. A structured pre-trip workflow eliminates guesswork, allowing you to maximize light windows regardless of how quickly weather conditions shift.
Phase 1: Virtual Reconnaissance and Scouting Photo Locations Remotely
The first phase of pre-trip scouting involves evaluating physical geography and spatial features using desktop tools. Remote sensing and 3D map rendering enable you to analyze micro-topography without being on-site.
Using Elevation Models and Satellite Imagery
High-resolution satellite imagery combined with Digital Elevation Models (DEMs) allows you to evaluate scale, sightlines, and foreground potential. Tools like Google Earth Pro, WebGIS platforms, and the official topographic datasets from Landmælingar Íslands (the National Land Survey of Iceland) provide essential structural data:
- Foreground Elements: Identify braided glacial river channels, basalt column geometries, tidal patterns on black sand beaches, and outlet glacier snouts. Look for leading lines in river sediment or lava fractures that lead toward a background subject.
- Sightlines and Occlusion: Use 3D elevation profiling to determine if a foreground ridge blocks a distant glacier or if a canyon rim obscures a waterfall’s plunge pool from a specific standing point.
- Micro-Topography: Distinguish between flat, featureless gravel beds and textured lava fields (such as einhyrningur formations or moss-covered hummocks) that provide structural anchors for wide-angle compositions.
Cross-Referencing Geography with Seasonal Accessibility
A location’s visual potential varies significantly across seasons. An open canyon shelf in August may be buried under unstable snow cornices in March. During remote scouting, cross-reference geographic features with seasonal constraints:
- Coastal vs. Interior Topography: Coastal sea stacks (such as Hvítserkur or Reynisdrangar) depend heavily on low-tide windows for safe beach access and reflective wet sand compositions. Interior highlands require stable ground free of deep snow melt.
- Sun Position & Relief Shading: North-facing canyons remain in shadow for most of the winter. Verify whether the canyon walls clear the solar arc during your travel dates.
Structuring Spatial Research with Open Coordinate Datasets
Organizing dozens of geographic points across Iceland requires a structured spatial framework. Rather than keeping ad-hoc pin drops across proprietary apps, professional workflows rely on standardized coordinates. The spatial database underpinning Iceland Photo Map is published as an open CC-BY dataset. What is provided in curated downloads is clean geographic formatting (KML, GPX, GeoJSON), structured categories, and essential seasonal access notes.
When conducting remote scouting, understand how location data is structured. For example, within the Iceland Photo Map catalog, 112 of the 121 locations carry a researched brief compiled from published sources, each listing its external references. These structured briefs are distinct from the 9 locations that carry written field notes based on direct visits. Using structured datasets allows you to sort locations by region, sunlight orientation, and access complexity before mapping them into your field devices.
Phase 2: Light Tracking and Seasonal Azimuth Calculation
Once you have identified candidate locations, the next step in scouting photo locations is analyzing solar geometry. Because Iceland sits between 63°N and 66°N latitude, solar path dynamics differ drastically from lower-latitude regions.
Calculating Solar Elevation and Azimuth Angles
Understanding solar geometry requires tracking two primary parameters: azimuth (the compass direction from which sunlight originates, measured in degrees from true north) and solar elevation (the angle of the sun above the horizon).
Landscape photographers should utilize sun tracking applications such as The Photographer's Ephemeris or SunCalc to model light trajectories for specific coordinates and dates. Key considerations include:
- Shoulder Season Light Dynamics (March/October): During equinox periods, the sun travels at a low angle across the southern horizon. The solar elevation angle remains relatively low even near solar noon, creating an extended golden hour that lasts for several hours rather than minutes. Photographers can shoot raking, low-angle light throughout the middle of the day.
- Midnight Sun Trajectories (June/July): Near the summer solstice, the sun barely dips below the northern horizon around midnight (civil twilight). The solar azimuth completes a 360-degree rotation, meaning north-facing cliffs and waterfalls—which are in deep shadow during winter—receive warm, direct side-lighting during early morning and late evening hours.
Shadow Analysis in High-Relief Terrain
Iceland’s steep fjord walls, volcanic caldera rims, and coastal sea stacks cast vast topographic shadows. A location that appears fully illuminated on a standard map may sit in total shade if a mountain block rises directly to its south or west.
Consider Aldeyjarfoss in North Iceland. The waterfall sits inside a deep canyon framed by vertical, symmetrical basalt columns. Because the canyon walls run in a north-south orientation, direct sunlight only reaches the gorge floor and interior walls during specific high-azimuth windows around mid-summer, or late afternoon windows when the sun aligns with the canyon mouth. If you arrive during a winter morning, the sun stays low behind the southern ridge, leaving the entire basin in flat, cold ambient shadow while high clouds flare above. Calculating this azimuth alignment before your trip dictates whether Aldeyjarfoss should be scheduled for late afternoon or early morning shooting.
Phase 3: Integrating Safety and Access into Your Iceland Photography Location Scouting Workflow
A theoretical composition is useless if the access track is washed out, the river crossing is impassable, or the location sits on protected private farmland. Incorporating real-time safety and physical access parameters into your Iceland photography location scouting workflow protects both your safety and your schedule.
Road Classifications and Seasonal Access Trends
Iceland's road network ranges from primary paved highways to unmaintained mountain tracks (F-roads):
- Paved Primary Roads (e.g., Route 1 / Ring Road): Generally open year-round, though winter storms can trigger temporary closures due to blowing snow or black ice.
- Gravel Secondary Roads: Require lower speeds and carry risks of loose gravel, washboards, and blind hills. Vehicle insurance coverage often excludes damage to undercarriages or wind-blown gravel damage to paint and glass.
- Highland F-Roads: Open primarily during summer months following winter thaw conditions. Driving an F-road requires a four-wheel-drive (4x4) vehicle with adequate ground clearance, as passenger cars are legally restricted on designated F-roads.
River Crossings, Approaching, and Parking Mechanics
Reaching remote vantage points often requires navigating terrain beyond the reach of standard vehicles:
- Glacial River Fordings: Many F-roads cross unbridged glacial rivers. River levels fluctuate significantly based on ambient temperature and rainfall; warm summer afternoons cause increased glacial melt, raising water levels and flow velocity compared to early morning. As recommended by safety authorities such as SafeTravel.is, photographers driving in the highlands should assess water conditions carefully or observe experienced local drivers before entering any river crossing.
- Walking Approach Times: Factor in hiking time across loose scree, wet basalt, or deep moss. A short approach over uneven lava terrain can take considerable time while carrying heavy camera gear. Account for walking times when planning around tight lighting windows.
- Parking and Land Status: Drivers are expected to utilize designated parking turnouts and established lots. Off-road driving is strictly prohibited in Iceland to protect delicate tundra moss and soil structures, according to guidelines from SafeTravel.is and local environmental authorities. Respect private property markers and close livestock gates behind you.
Relying on Primary Official Sources vs. Static Maps
Static map datasets and GPX files provide coordinates, access notes, and spatial context, but they do not provide real-time hazard monitoring. You must consult primary Icelandic safety services daily during your trip:
- Road Conditions & Closures: Check Vegagerðin (Road.is) for live road status, webcams, and mountain pass openings.
- Weather & Aurora Forecasts: Monitor Vedur.is (Icelandic Meteorological Office) for localized wind speeds, gust warnings, precipitation radar, and cloud cover models.
- Safety Alerts: Register travel plans and review active search and rescue advisories on SafeTravel.is.
The location files you export during pre-trip scouting carry static season and access notes. They do not monitor live conditions. As emphasized by official authorities, photographers should always verify static waypoints against live conditions on Vegagerðin (Road.is) and Vedur.is prior to entering remote field locations.
Phase 4: Structuring Waypoints and Offline Maps for Field Deployment
Cellular coverage in Iceland is generally strong along Route 1, but drops significantly in deep canyons, the Fjords, and the Central Highlands. Relying on cloud-based web maps while driving through non-networked areas leads to missed turnoffs and lost shooting opportunities. Your spatial planning must be saved locally on your device.
Exporting Standardized Spatial Formats
To ensure your remote research works without cell service, export spatial data into standard interchange formats:
- GPX (GPS Exchange Format): Universal format compatible with standalone GPS units (e.g., Garmin), handheld devices, and mapping software. Stores waypoints, tracks, and routes.
- KML / KMZ (Keyhole Markup Language): Ideal for Google Earth and apps like Gaia GPS or Maps.me. Preserves custom icons, color coding, and nested folder structures.
- GeoJSON: Lightweight spatial format widely supported by modern mobile GIS applications and custom mapping software.
The KML, GPX, and GeoJSON files live locally on your device, meaning all coordinates and waypoints function with zero cellular signal. However, downloading offline topographic map tiles (the background visual terrain) is a separate step that must be completed inside your mapping application prior to departure.
Configuring Offline Navigation Apps
Once spatial files are saved on your device, import them into dedicated offline mapping platforms. Popular choices include Gaia GPS, OsmAnd, and Organic Maps. For example, if you use Gaia GPS, follow an established KML import guide for Gaia GPS to structure your waypoints into custom layers, verify elevation contours, and download full vector map packages for offline storage.
Understand the technical division of labor during field navigation: the spatial dataset provides precise location waypoints, parking coordinates, and field notes, while your chosen mapping app (Gaia GPS, OsmAnd, Organic Maps, or a standalone Garmin unit) handles terrain routing and map rendering.
Mapping Software Options Comparison
To evaluate mapping tools for your workflow, review this comparison of standard offline platforms against spatial dataset files:
| Tool / System | Primary Function | Offline Routing | Best Used For |
|---|---|---|---|
| Iceland Photo Map (GPX/KML) | Curated location, parking & access data | Requires mapping host app | Pre-trip scouting, structured location waypoints, field notes |
| Gaia GPS | Topographic mapping & track recording | Yes (with downloaded tiles) | Highland hiking, contour analysis, overlaying custom KML/GPX layers |
| OsmAnd | OpenStreetMap-based vector navigation | Yes (offline vector routing) | Detailed turn-by-turn driving routing, track logging, offline POI search |
| Organic Maps | Lightweight offline map viewer | Yes (basic vector routing) | Fast, battery-efficient offline visual waypoint viewing in low-signal zones |
Photographers seeking a mobile companion app can utilize Iceland Co-Pilot. Iceland Co-Pilot is live on Google Play, Android only, and included free with any Iceland Photo Map purchase — it is not sold separately and there is no separate Co-Pilot tier. The location catalog, field notes, parking and access notes, and arrival detection work today; full offline map tiles, light windows, road and weather status, and day routing remain in active development.
When selecting your planning tools, compare options on their own merits. For a transparent comparison between digital waypoint datasets, physical guidebooks, and commercial mapping services, review the sourced guide to Iceland photography guides compared, which details where rival solutions excel.
Refining Your Iceland Photography Location Scouting Workflow for Live Conditions
Even the most detailed Iceland photography location scouting workflow must adapt to real-world conditions. Subarctic weather frequently disrupts plans. Successful landscape photography requires building flexibility into your schedule.
Building Tactical Hub-and-Spoke Options
Rather than planning a rigid, linear itinerary that requires reaching a specific distant location every evening, structure your route around geographical hubs (e.g., Vík, Höfn, Lake Mývatn, or Grundarfjörður). For each hub, identify primary, secondary, and tertiary shooting targets:
- Primary Target (Ideal Conditions): High-exposure, open landscape locations that depend on clear skies or golden hour side-lighting (e.g., coastal mountain ridges or open sea stacks).
- Secondary Target (Overcast / High Cloud): Intimate river canyons, basalt formations, or waterfalls where ambient diffused light enhances saturated moss colors and eliminates severe dynamic range issues (e.g., Column gorges or enclosed falls).
- Tertiary Target (Gale Winds / Severe Storms): Sheltered architectural subjects, tidepools protected from open ocean swell, or historic structures where severe weather adds dramatic atmosphere without posing safety hazards. For instance, the black church at Búðakirkja on the Snæfellsnes Peninsula provides strong graphic compositions during heavy storm skies or rain breaks, making it an excellent fallback when mountain peaks are clouded out.
If you are planning a multi-day journey, structuring your shooting hubs around proven geographic routes—such as a flexible 7-day Iceland photography itinerary—allows you to shift between coastal, valley, and canyon locations based on live weather fronts.
Adapting Sightlines for Weather and Wind
When severe weather strikes in the field, quick adjustments are critical:
- Sustained High Winds: Avoid cliff edges (such as Dyrhólaey or Látrabjarg) where strong wind gusts can knock over tripods or throw spray onto front lens elements. Shift to low-elevation valley bottoms or protected rock amphitheaters.
- Low Cloud Ceilings: When mountain peaks like Vestrahorn or Kirkjufell are shrouded in cloud, widen your field of view to emphasize foreground black sand ripples, ice fragments, or crashing surf rather than missing shots waiting for cloud cover to clear.
- Heavy Rain & Spray: Switch to long focal length compression from inside vehicle cover or natural rock overhangs, or pivot to micro-landscape compositions using macro or standard focal lengths on wet volcanic textures.
Prior to your trip, review research briefs and field notes to know which targets offer wind protection or alternative sightlines. Within the Iceland Photo Map location database, 9 of the 121 locations carry written field notes (detailing exact tripod footprints, parking hazards, and micro-compositions), while 112 locations carry researched briefs compiled from published sources with cited references. Evaluating these notes in advance helps you make informed tactical decisions when weather forces a change of plans.
Executing Your Shot Plan Seamlessly Across the Island
Executing a successful landscape photography trip in Iceland comes down to merging disciplined desktop research with real-time field flexibility. By completing your spatial analysis, solar elevation tracking, and waypoint organization before departure, you eliminate the stress of spot scouting under shifting skies.
Before packing your camera bags, verify that all coordinate files, topographic map layers, and field notes are downloaded locally to your mobile devices. Iceland Photo Map sells downloadable files directly—nothing is printed or physically posted. Buying does not create an account; files are emailed and downloadable immediately upon order. Additionally, if a file fails to load properly on your device, emailing within 30 days guarantees technical support or a full refund. Iceland Photo Map does not publish customer reviews, testimonials or star ratings, and no rating markup appears on the site, focusing entirely on clean, verified spatial data for serious photographers in 2026.
By relying on accurate geographic data, calculating light angles, and staying flexible in the field, your scouting workflow will help you turn unpredictable subarctic conditions into portfolio-grade images.
Frequently Asked Questions
How far in advance should I start scouting photo locations for an Iceland trip?
You should begin remote scouting 2 to 3 months prior to departure. This provides sufficient time to analyze satellite imagery, track seasonal sun angles for your specific travel dates, review historical F-road opening trends, and organize your waypoints into clean KML/GPX structures for offline device deployment.
Do I need offline map apps if I already have coordinate files saved on my phone?
Yes. Coordinate files (GPX, KML, GeoJSON) contain spatial point locations, waypoints, and text notes, but they do not contain underlying map imagery. An offline mapping application (such as Gaia GPS, OsmAnd, or Organic Maps) is required to render topographic contour tiles, road layers, and terrain elevation models without cellular signal.
How do I determine if a remote location is safe to access during shoulder seasons?
Determining safety during shoulder seasons (March–April and September–October) requires checking static terrain data alongside real-time monitoring platforms. Evaluate ground slope and river requirements using elevation profiles during pre-trip planning, then monitor live road closures on Vegagerðin (Road.is) and atmospheric/wind warnings on Vedur.is daily while in Iceland.
What is the difference between open coordinate datasets and field notes?
An open coordinate dataset provides spatial latitude and longitude coordinates, geographic categorization, and baseline administrative data published under open licenses (such as CC-BY). Field notes and research briefs add analytical value: field notes offer direct, on-the-ground observations regarding tripod placement, parking hazards, and compositions, while researched briefs synthesize geographic details from published sources.
Download Iceland Photo Map's curated, ready-to-import KML and GPX waypoint datasets to streamline your pre-trip scouting and load custom location data directly into your favorite offline navigation app.