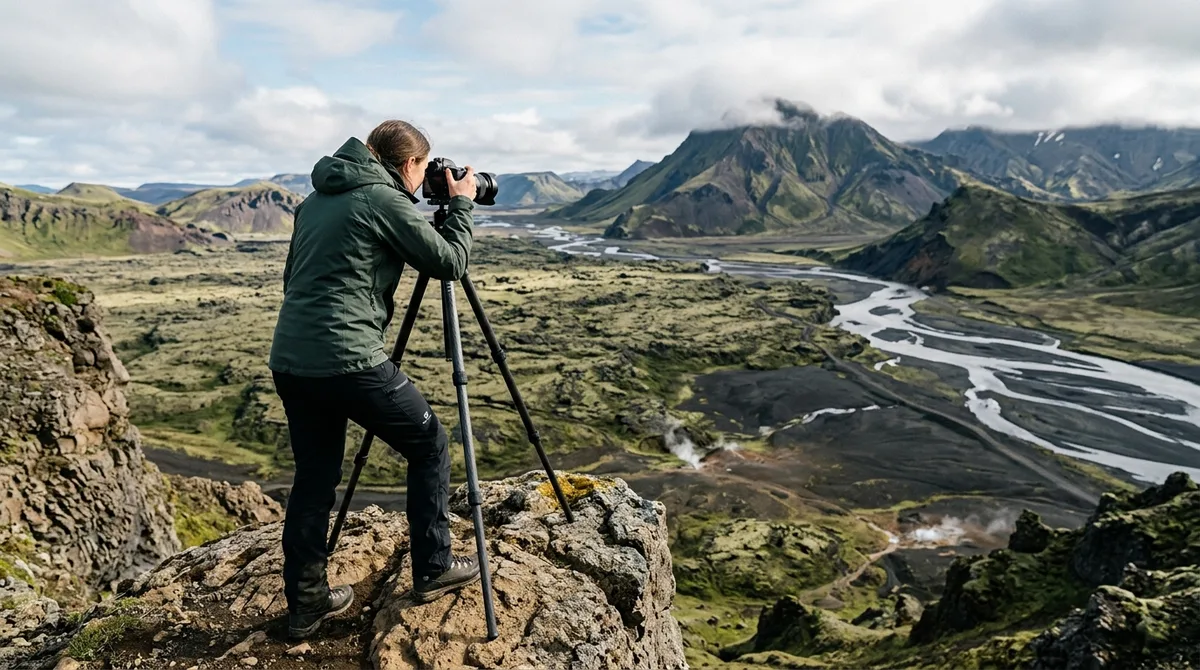
Mastering raw terrain photography across the volcanic rift requires direct access to high-contrast basalt columns, geothermal steam vents, expansive tephra outwash plains, and young lava flows. Finding the most compelling geological photography locations iceland has to offer means understanding how tectonic movement, volcanic chemistry, and polar weather interact to sculpt visual forms across the landscape.
Positioned squarely over both the Mid-Atlantic Ridge and a deep mantle plume, Iceland presents a dynamic volcanic environment where the North American and Eurasian plates pull apart at an average rate of roughly 2 centimeters per year. This tectonic divergence continuously exposes fresh tholeiitic basalt, intricate columnar cooling formations, palagonite ridges, and mineral-saturated geothermal systems. For photographers pursuing raw volcanic landscape photography, the country serves as an open-air laboratory of texture, light, and monumental scale.
Top Geological Photography Locations in Iceland and Why They Matter
Iceland's geological activity is concentrated primarily along its neovolcanic zones—narrow volcanic rift systems traversing the island from the southwest to the northeast. To build an efficient photography expedition, you must understand the primary geographic clusters and the distinct geological signatures they offer:
- The Reykjanes Peninsula & Southern Volcanic Zone: The direct surface manifestation of the Mid-Atlantic Ridge. Here, expansive fields of fresh pahoehoe (smooth, ropy lava) and 'a'a (rough, blocky lava) intermingle with fissure swarms, tuff cones, and crater rows. Locations such as the Sundhnúkagígar crater chain and the fissures near Fagradalsfjall provide immediate access to raw, post-eruptive basalt terrain.
- The Lake Mývatn Basin & Krafla System (North Iceland): A concentrated volcanic landscape featuring pseudo-craters at Skútustaðagígar, steaming solfataras at Hverir, and extensive fissure swarms cutting through older basalt shield volcanoes. The regional chemistry produces intense yellow sulfur crusts, grey-blue boiling mud pools, and jet-black volcanic glass (obsidian).
- The Highlands (Fjallabak & Kerlingarfjöll): Where basalt transitions into silica-rich rhyolite. Subglacial eruptions during the Pleistocene created steep palagonite (hyaloclastite) ridges and multi-colored mountain massifs striped with reds, ochres, greens, and pale yellows, deeply incised by glacial rivers and active fumaroles.
- The South Coast Sandur & Sea Stacks: Expansive black sand outwash plains formed by cataclysmic glacial outburst floods (jökulhlaups), framed by wave-carved basalt sea cliffs, pyramidal basalt sea stacks, and massive hexagonal column columns at the boundary between ice and ocean.
Translating these tectonic forces into evocative imagery requires balancing scale, surface texture, and dynamic range. Fresh volcanic basalt absorbs significant ambient light, creating deep shadows that contrast against bright white glacial ice, vibrant green moss carpets, or pale geothermal steam. Identifying the underlying geological mechanisms helps you anticipate where light will carve relief into fissures, illuminate mineral seams, or define the hexagonal symmetry of cooling lava.
Mastering Basalt Formation Photography: Columns, Hexagonal Textures, and Lighting Angles
Columnar jointing represents one of nature's most orderly geometric phenomena, making basalt formation photography a staple of geological fieldwork. These structures form during the slow thermal contraction of thick basaltic lava flows, sills, or dikes. As molten basalt cools from the exterior inward, tensile stresses accumulate. When the rock can no longer stretch, it fractures along a network of perpendicular tension joints, creating hexagonal, pentagonal, and heptagonal prism columns.
Columnar basalt typically presents two structural zones within a single flow:
- The Colonnade: The lower (and sometimes upper) layer where cooling was slow and uniform, producing clean, straight, vertical hexagonal columns.
- The Entablature: The middle zone where rapid or irregular water-cooling caused the joints to fracture into curved, twisted, and chaotic fan-like rosettes.
Capturing these distinct textures requires matching your composition to the specific formation's morphology and orientation.
At the remote waterfall of Aldeyjarfoss in the Bárðardalur valley, dark, twisted entablature basalt sits directly atop symmetrical vertical colonnades, framing a raging glacial torrent. To emphasize the visual tension between the chaotic upper basalt and the orderly lower columns, position a mid-range focal length (35–50mm) to isolate the waterfall's plunge pool against the column walls. In contrast, at Reynisfjara on the South Coast, massive vertical sea cliffs of pale-grey colonnade columns rise from a black sand beach. Here, an ultra-wide lens (16–24mm) positioned close to the base lets you exaggerate the vertical perspective, using the column joints as leading lines directly toward the sky.
At Stuðlagil Canyon in East Iceland, the turquoise-blue glacial river cuts through one of the densest concentrations of towering basalt columns on the island. When shooting basalt formations, evaluate your lighting conditions carefully:
- Low-Angle Rake Lighting: When the sun tracks low along the horizon (typical of early morning, late evening, or shoulder-season afternoons), light skims across the columnar faces. This sidelight creates strong directional shadows inside the joint fractures, emphasizing the 3D relief and polygon patterns of the rock.
- Diffuse Overcast Light: Direct midday sun creates harsh highlights on wet basalt while plunging joint crevices into pure black shadow. High, even cloud cover reduces dynamic contrast, allowing camera sensors to resolve subtle mineral variations, iron oxidation patinas, and delicate lichen growth inside the columns.
For focal length strategies, use wide-angle glass (16–24mm) when you need to situate columnar cliffs within their broader environmental context—such as incorporating turbulent surf or falling water.
Volcanic Landscape Photography Across Active Fissures, Tephra Plains, and Craters
Active fissure swarms and historic eruption sites present an entirely different compositional challenge. In volcanic rift zones across the Reykjanes Peninsula such as Fagradalsfjall, Litli-Hrútur, and the Sundhnúkagígar crater chain, photographers encounter landscapes shaped by ongoing tectonic displacement and volcanic unrest monitored by SafeTravel Iceland. Fresh basalt flows display delicate, glassy crusts, iridescent blue-grey oxidation films, and porous scoria cones that require deliberate exposure control.
When framing recent lava fields, avoid flat, unstructured overviews. Instead, search for textural anchor points: curved ropy folds in pahoehoe crusts, open squeeze-up fissures where fresh lava pushed through solidifying rock, or bright mineral sublimates (such as gypsum or native sulfur) collecting around cooling steam cracks.
On expansive sandur plains (such as Skeiðarársandur or Mýrdalssandur) and long crater chains like the 27-kilometer-long Lakagígar fissure, scale is difficult to convey. These environments feature vast expanses of black basaltic tephra, lapilli, and ash that can easily appear as two-dimensional empty space on camera. To overcome this, use a low camera height—often 30 to 50 centimeters above the ground—to turn foreground tephra ripples and volcanic bombs into structural elements leading toward distant crater rims or glacier tongues.
Dynamic range management is critical when shooting black sand landscapes under variable skies. Dark basalt absorbs light, often metering 3 to 4 stops below an overcast sky or bright snowfield. To capture balanced exposures:
- Use Graduated Neutral Density (GND) Filters: A 2-stop or 3-stop soft-edge GND filter helps balance bright horizons without causing unnatural darkening on jagged crater edges.
- Implement Exposure Bracketing: Capture a 3-frame bracket (-2, 0, +2 EV) to retain textural detail in deep volcanic rock shadows while preventing blown highlights in sky details or reflective water channels.
- Deploy Circular Polarizers (CPL) Judiciously: Wet volcanic sand and damp basalt reflect broad glare, washing out the rich black and charcoal tones of the rock. A circular polarizer cuts surface glare from wet lava, revealing the true density of the rock. However, rotate the filter carefully—over-polarizing can turn wet basalt unnaturally matte, eliminating specular highlights that define rock texture.
Capturing Rhyolite Ridges and Geothermal Features in the Interior Highlands
Deep within the Icelandic interior, basaltic volcanism yields to explosive, highly differentiated rhyolitic systems. Landmannalaugar and Kerlingarfjöll contain mountains formed by subglacial eruptions where magma cooled rapidly under thick ice, creating vibrant mountains composed of rhyolite, obsidian, and hydrothermally altered clay.
The visual impact of rhyolite lies in its complex mineral color palette: iron oxides yield deep rust-reds and oranges; chlorite and glauconite provide subtle olive-greens; sulfur contributes neon yellows; and weathered clays create pale cream tones. To translate these colors accurately, time your shoots around soft, directional lighting during early morning or late evening. Harsh overhead sunlight bleaches the delicate pastel hues of rhyolite, while wet, rainy conditions darken the clay surfaces, increasing saturation but reducing tonal separation between adjacent mineral layers.
In high-temperature geothermal areas such as Hverir (Námafjall), Torfajökull, and Hveradalir, boiling mud pots (solfataras), pressurized steam vents (fumaroles), and boiling springs add dynamic movement to the static rock:
- Fast Shutter Speeds (1/500s–1/1000s): Use quick exposures to freeze turbulent bursts of boiling clay, airborne steam vortices, and textured water droplets thrown by active spatter cones. This freezes micro-textures in the mud bubbles and steam clouds.
- Long Shutter Speeds (1s–10s): Use neutral density filters to create smooth, ethereal vapor trails from fumaroles, contrasting dynamic white steam against sharp, mineral-encrusted clay ridges.
Photographing in the interior Highlands requires strict seasonal planning. Most Highland F-roads (such as F208, F26, and F347) are inaccessible under snowpack and spring mud closures until mid-to-late June, and begin closing again due to early autumn blizzards by mid-September. Before embarking on a Highland route, verify current mountain road access and river ford conditions via Vegagerðin (the Icelandic Road and Coastal Administration).
Field Gear and Exposure Techniques for High-Contrast Geological Photography Locations in Iceland
Operating across active volcanic terrain and geothermal fields exposes camera equipment to harsh environmental hazards. Airborne tephra consists of fine-grained, highly abrasive glass shards and basalt particles. When carried by high Arctic winds, this volcanic grit can scratch lens front elements, jam zoom barrels, and damage internal camera sensor chambers during lens swaps.
Follow these essential field protection protocols:
- Protect Front Optics: Keep high-quality multi-coated UV or clear protective filters mounted on all lenses. If fine volcanic ash scratches the front glass, replacing a filter is far less costly than replacing a lens element.
- Guard Against Corrosive Vapors: Geothermal steam contains concentrated hydrogen sulfide (H2S) and sulfur dioxide (SO2), which react with moisture to form weak sulfurous and sulfuric acids. These acidic vapors can corrode exposed copper camera contacts, damage magnesium-alloy body coatings, and pit optical lens coatings. Avoid leaving a camera sitting static within a downwind steam plume.
- Manage Lens Swaps in the Field: Perform all lens changes inside a closed camera backpack or dry bag, pointing the camera mount downward to prevent blowing ash or salt spray from settling directly onto the sensor.
- Secure Tripod Stability: Volcanic scoria, loose tephra slopes, and wet sand provide poor purchase for standard rubber tripod feet. Swap rubber feet for stainless-steel spikes that can penetrate through loose upper gravel down to solid substrata. Hang your camera pack from the tripod's center column hook to lower the center of gravity against sudden wind gusts.
| Geological Feature | Recommended Lens Range | Key Filter Choice | Optimal Light Angle |
|---|---|---|---|
| Basalt Columns (Cliffs & Canyons) | 16–35mm (context) / 70–200mm (patterns) | Circular Polarizer (cuts wet rock glare) | Low rake sidelight or diffuse overcast |
| Rhyolite Highlands & Ridges | 24–70mm / 100–400mm (ridge compression) | Graduated ND (0.6 or 0.9 Soft) | Low golden hour / soft morning sun |
| Active Fissures & Fresh Lava | 24–105mm | UV / Clear protector (shield from ash) | Blue hour or overcast (balances dark rock) |
| Geothermal Fumaroles & Mud Pots | 50–135mm (safe distance) | 3-stop to 6-stop ND (steam motion blur) | Backlight (illuminates white steam plumes) |
For high-contrast geological photography locations iceland presents, follow an "Expose to the Right" (ETTR) metering strategy. Modern mirrorless sensors have high dynamic range capabilities, but dark basalt lacks luminance. By intentionally pushing your exposure to the right side of the histogram without clipping highlight channels, you capture maximum signal in the shadow tones of the volcanic rock. In post-processing, pulling down exposure levels recovers full shadow textures without introducing digital sensor noise into the dense black basalt.
Preserving Fragile Volcanic Moss and Staying Safe Near Geothermal Fields
The raw aesthetic of Icelandic volcanic fields is defined by the contrast between dark, barren rock and thick carpets of woolly fringe-moss (Racomitrium lanuginosum). This slow-growing moss is the primary pioneer species colonizing young lava fields. It takes decades to centuries to establish a thick, contiguous mat over jagged basalt blocks.
rarely walk on volcanic moss. Because Racomitrium has no vascular root system and anchors directly to loose volcanic scoria, human footsteps shear the living plant tissue from the underlying rock. Footprints left in moss beds remain visible for decades, exposing underlying tephra to wind erosion and preventing natural regeneration. often stay on designated walking paths, exposed rock faces, or gravel trails when framing your shots.
Geothermal fields and volcanic rifts present significant physical hazards to photographers who focus solely on their viewfinders:
- Fragile Geothermal Crusts: In solfatara fields like Hverir or Kerlingarfjöll, the ground often consists of a thin, bleached mineral crust overlying boiling mud and acidic water at temperatures exceeding 90°C (194°F). Stepping off marked wooden boardwalks can result in catastrophic breakthrough accidents and severe thermal burns.
- Gas Accumulation in Low Graben Depressions: Heavy volcanic gases—primarily carbon dioxide (CO2) and sulfur dioxide (SO2)—are denser than air and collect in low-lying depressions, crater bottoms, and fault crevices during calm weather. If you smell strong sulfur, experience eye or throat irritation, or notice dizziness, immediately move upwind to higher ground.
- Unstable Crater Rims: Tephra cones and scoria craters consist of unconsolidated volcanic gravel that easily shears underfoot. Keep a safe distance back from vertical drops, as the edges of active craters are frequently undercut by thermal alteration.
Always review regional hazard notices and seismic activity reports before entering active volcanic zones. Consult the Icelandic Meteorological Office for updated volcanic hazard assessments, gas dispersion models, and earthquake swarm tracking across active rift zones.
Planning Your Geological Route: Managing Waypoints and Light Windows
Building a successful photography itinerary across Iceland's varied geological zones requires organizing your journey around light direction, regional terrain types, and seasonal road logistics. A structured route like a 7-day Iceland photography itinerary allows you to transition smoothly from the young fissure systems of the southwest to the columnar basalt waterfalls and rhyolite valleys of the north and interior.
Understanding light angles is essential for volcanic photography. In midsummer (June–July), the midnight sun skims along the northern horizon, providing hours of continuous golden hour and soft, directional light that grazes across horizontal lava plains and canyon rims. In winter and shoulder months, the sun remains low in the sky throughout the day, casting long, dramatic shadows that reveal the texture of columnar joints and crater rims without harsh midday overhead glare.
To navigate efficiently between geological waypoints, import curated spatial datasets into reliable mapping applications before departing. The KML, GPX and GeoJSON files live on your device, so the waypoints work with no signal. Downloading offline map tiles is a separate step inside your mapping app. You can review our workflow guide for importing KML files into Gaia GPS, OsmAnd, or Garmin devices to maintain reliable field navigation across remote Highland tracks where cellular data is unavailable.
The files carry season and access notes, not live conditions. Check vedur.is and road.is for current weather and road status prior to setting out each morning. By combining structured spatial planning with careful monitoring of local conditions, you can position yourself at complex geological formations when lighting and weather align.
Transforming Icelandic Volcanic Geology into Compelling Visual Narratives
Photographing Iceland's volcanic geology is fundamentally an exercise in visual storytelling. By juxtaposing the monumental scale of tectonic rifts with the micro-geometry of columnar joints and the fluid movement of geothermal steam, your images can communicate the ongoing forces that continue to shape the North Atlantic basin.
Before stepping into the field, ensure your equipment checklist is tailored for volcanic environments:
- Weather-sealed camera body with sensor-cleaning supplies and spare batteries stored in insulated pockets.
- High-quality multi-coated protective filters on all glass elements to guard against abrasive ash.
- Sturdy tripod equipped with interchangeable stainless-steel spike feet for loose scoria.
- Circular polarizer (CPL) and 3-stop/6-stop neutral density (ND) filters for managing rock glare and steam movement.
- Heavy-duty dry bags or rain covers to protect camera bodies from acidic geothermal moisture.
- A curated spatial dataset of target coordinates loaded onto your offline field navigation device.
By respecting fragile ecosystems, observing active geothermal safety protocols, and utilizing precise exposure techniques, you will return with a compelling, technically refined portfolio of Iceland's raw volcanic landscapes.
Frequently Asked Questions
What is the best time of year to photograph geological formations in Iceland?
The optimal season depends on your target geology. For interior Highland rhyolite mountains (such as Landmannalaugar and Kerlingarfjöll), the window is mid-summer (late June to early September) when Highland F-roads are open and free of snowpack. For coastal basalt columns, active fissure zones on the Reykjanes Peninsula, and southern volcanic sandur plains, autumn and winter provide dramatic low-angle golden light throughout the day, though winter conditions require monitoring for snow cover that can obscure surface rock textures.
Which lenses work best for volcanic landscape photography and basalt columns?
A two-lens kit covering 16–35mm and 70–200mm provides the versatility needed for volcanic terrain. An ultra-wide 16–35mm lens lets you capture the monumental scale of basalt column cliffs, wide crater chains, and foreground tephra textures. A 70–200mm telephoto lens compresses distant rhyolite ridge layers and isolates abstract geometric patterns within columnar jointing networks without stepping onto fragile moss or dangerous geothermal ground.
Is it safe to photograph active geothermal areas and volcanic fissures in Iceland?
Photographing geothermal areas and volcanic fissures is safe provided you strictly adhere to marked trails, designated viewing areas, and official safety warnings. Stay on wooden boardwalks in high-temperature geothermal fields to avoid breaking through thin mineral crusts into boiling mud. In active volcanic zones, monitor wind direction to avoid toxic sulfur dioxide (SO 2 ) gas plumes that accumulate in low-lying depressions, and often check official hazard assessments before heading into the field.
How do I protect my camera gear from abrasive volcanic sand and geothermal sulfur?
To shield equipment from volcanic grit, keep protective UV filters mounted on all lenses, change lenses only inside a closed camera bag or vehicle, and clean optical surfaces using a blower brush before applying a microfiber cloth. To guard against corrosive geothermal sulfur, avoid positioning your gear downwind in dense steam plumes, wipe down metal tripod legs and camera bodies with a damp freshwater cloth after shooting near fumaroles, and store gear inside sealed dry bags.
Download the complete Iceland Photo Map GPS dataset to import curated coordinates of basalt columns, crater rows, and geothermal features directly into your preferred offline navigation app.