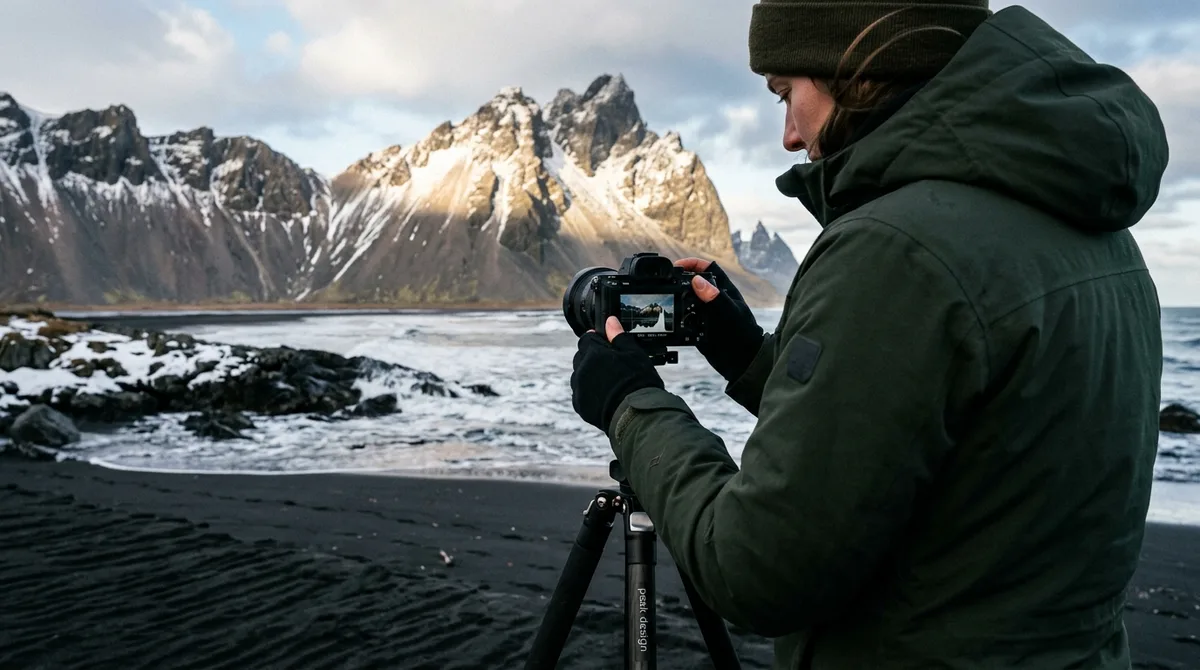
Mastering Iceland photography histogram analysis is the only reliable way to capture dynamic range extremes between pitch-black basalt and radiant glacial ice without clipping highlights or crushing shadow detail. Relying on an LCD screen in subarctic ambient light guarantees blown-out water and muddy volcanic sands, making the camera's graphical tonal display an indispensable field tool.
Iceland presents some of the most punishing optical environments on Earth. Photographers regularly transition from light-absorbing volcanic desert plains to blinding ice lagoons under rapidly shifting cloud decks. In these conditions, understanding how to interpret, evaluate, and react to your camera's histogram is not just an academic exercise—it is the difference between an unrecoverable raw file and a master-grade landscape photograph.
The Subarctic Dynamic Range Challenge: Why LCD Previews Fail in Iceland
Every digital sensor measures light linearly, but the human eye—and the camera's rear LCD screen—does not. When shooting subarctic terrain, relying on visual inspection of the back-of-camera display introduces severe exposure errors due to ambient conditions and environmental physiology.
Iceland's landscape features dramatic surface reflectivity (albedo) differentials. Wet volcanic basalt sand has an albedo of roughly 0.05, absorbing approximately many incident light. In stark contrast, fresh snow, foaming Atlantic surf, and dense glacial ice exhibit albedo ratings exceeding 0.60 to 0.85, reflecting the vast majority of ambient illumination. This juxtaposition often creates a dynamic range exceeding 14 stops within a single frame, pushing modern full-frame sensors directly to their physical limits.
Under a typical Icelandic sky, your eyes constantly adapt to volatile ambient illumination. In sub-zero temperatures, the liquid crystal response time of your camera's LCD slows, shifting perceived contrast and brightness. When shooting amidst gale-force winds on the South Coast or under an overcast sky at noon, your pupils constrict, making images on the LCD appear dimmer than they actually are. The natural human reaction is to dial in positive exposure compensation, which inadvertently pushes highlights into irreversible clipping.
Conversely, during the prolonged twilight of winter or deep midnight sun sessions, your dilated pupils cause the LCD to appear vibrant and bright in the gloom. You may mistakenly conclude an exposure is adequate, only to open the raw file in your digital audio/visual workstation or raw processor to find crushed shadows riddled with severe chrominance noise. The camera histogram provides an objective, mathematically precise distribution of tonal values across 256 discrete levels (from absolute black at 0 to pure saturation at 255), completely independent of ambient viewing conditions.
Core Principles of Iceland Photography Histogram Analysis in Field Conditions
Executing accurate Iceland photography histogram analysis begins by switching off the standard monochrome luminance display and enabling the individual Red, Green, and Blue (RGB) histogram overlay.
A luminance histogram represents an averaged tonal calculation—traditionally weighted around 30% red, 59% green, and 11% blue—to mimic human perceived brightness. Because of this weighting, a luminance display will frequently show safe highlight margins even when a single color channel is severely clipped. For a deeper technical breakdown of how tonal distribution and luminance weighting operate mathematically, consult Cambridge in Colour's guide to camera histograms.
In subarctic landscapes, individual color channel saturation happens far earlier than broad luminance clipping:
- The Blue Channel: Glacial crevasses, deep calving ice blocks, and clear subarctic skies saturate the blue channel rapidly. An averaged luminance histogram will show the ice comfortably within range, while the raw blue channel registers at pure 255 saturation, turning vivid cyan ice into chalky, desaturated white.
- The Red Channel: Low-angle subarctic sunrises and sunsets throw intense red-orange wavelengths across storm clouds. If you judge exposure by the luminance curve, the vibrant crimson highlights in the sky will blow out completely, leaving harsh, unnatural banding.
- The Green Channel: Dense moss carpets (such as the Racomitrium lanuginosum found in the Eldhraun lava field) and strong aurora displays can saturate the green photosites while the overall scene remains dark.
To evaluate these complexities at a glance, study how individual channels saturate independently. Cambridge in Colour's analysis of RGB histograms illustrates how color saturation triggers clipping before luminance displays signal caution. Cross-reference your RGB readout by enabling your mirrorless camera's zebra striping. Setting zebras to 100% or 105% flags raw sensor saturation, while setting them to 94–95% warns you that delicate highlight textures in cascading water or bright snowfields are approaching critical clipping.
Exposing to the Right (ETTR) Across Glaciers, Waterfalls, and Black Sand
The sensor inside your camera is an analog collection device that measures photon counts linearly. Because of this linear response, half of all discrete tonal values recorded by a 14-bit analog-to-digital converter (8,192 of 16,384 levels) are dedicated strictly to the brightest stop of exposure. The remaining stops share progressively fewer levels, with the deepest shadow stop receiving a meager fraction of data.
The technique of exposing to the right iceland landscapes involves deliberately pushing the exposure graph as far to the right-hand wall as possible without allowing the curve to climb the vertical 255 ceiling. By maximizing the signal captured by the sensor, you dramatically improve the signal-to-noise ratio (SNR). In post-production, pulling this exposure down yields clean, noise-free basalt shadows, rich textures in volcanic ash, and smooth tonal transitions throughout midtone mosses.
However, successful ETTR in high-contrast subarctic landscapes requires strict adherence to native sensor parameters:
- Maintain Base ISO: Modern digital sensors deliver their maximum dynamic range (frequently 13 to 14.5 stops) strictly at base ISO (typically ISO 64 or 100, depending on the manufacturer). Raising your ISO reduces sensor saturation capacity, compressing dynamic range and reducing the margin available for highlight retention.
- Evaluate Specular vs. Diffuse Highlights: Specular highlights—such as the direct solar reflection glittering off wet black sand or diamond-like ice crystals—can safely clip at the far right edge. Attempting to pull an exposure down to preserve raw sun glints on wet stone will plunge the rest of your Icelandic composition into severe underexposure. Conversely, diffuse highlights—such as the foaming plunge pool of a waterfall or the structural texture of a glacier snout—must sit cleanly below the 255 mark.
- Watch for Rapidly Changing Spray: At high-volume cascades like Skógafoss or Kvernufoss, churning airborne spray density changes second by second. If you meter ETTR during a lull in spray and release the shutter as a mist plume surges, that plume will instantly blow out. Leave a 1/3-stop safety cushion on the right wall when shooting moving water in high wind.
Advanced Iceland Photography Histogram Analysis for Midnight Sun and Twilight
During summer in high latitudes, the sun travels at a remarkably shallow angle relative to the horizon, skimming the perimeter of the landscape for hours rather than dipping sharply below it. This prolonged low-angle trajectory yields extensive golden hours, but it introduces extreme backlighting challenges that show up on the display as a severe "U-shaped" or dual-spike histogram.
In a dual-spike profile, one tall cluster of pixels stacks against the far left wall (representing the shadowed faces of sea stacks, basalt canyons, or mountain flanks), while a second sharp peak pins itself against the far right wall (representing the illuminated sky and glowing clouds). In these moments, standard Iceland photography histogram analysis forces an immediate technical choice: use optical filtration, bracket your exposures, or intentionally sacrifice tonal data.
Here is how to analyze that histogram gap and select the proper tool in the field:
- The 2-Stop to 3-Stop Gap: If the histogram shows your shadow values sitting around the 15–many mark while the highlights are kissing the right wall, a single exposure captured at base ISO contains sufficient dynamic range to recover the composition cleanly. Lift the shadows during raw development while leaving the highlights intact.
- The 4-Stop to 6-Stop Spread: When the histogram's shadow peak collides with the left wall while the sky clips the right, dynamic range exceeds the single-capture capabilities of the sensor. If the horizon is relatively flat (such as ocean cliffs or volcanic outwash plains), insert a soft or medium 2-stop or 3-stop Graduated Neutral Density (GND) filter. As you slide the filter down, watch the right-hand peak on your live histogram shift smoothly toward the center, closing the exposure gap without degrading raw shadow quality.
- Irregular Horizons and Canyons: When jagged basalt columns, volcanic peaks, or deep gorges make optical filters impractical, switch to multi-frame exposure bracketing (typically 3 frames spaced at 2-stop intervals: -2 EV, 0 EV, +2 EV). Inspect each exposure's histogram independently: the underexposed frame must cleanly isolate the sunlit sky below clipping, while the overexposed frame must fully displace the shadow peak away from the left vertical boundary.
Take care during late midnight sun transitions to isolate the red channel. Even when shooting into twilight skies that look soft to your eyes, the red channel will frequently spike upward into clipping long before the green and blue channels approach the midtones.
Essential Landscape Histogram Tips for Winter and Aurora Borealis Framing
Winter field work across subarctic regions brings an entirely different set of histogram behaviors. When tracking night displays, extreme low-light capture demands specialized landscape histogram tips that run counter to traditional daytime methodology.
A properly exposed aurora borealis photograph will almost rarely resemble a balanced bell curve. Because the night sky and dark terrain occupy the majority of the frame, the bulk of your histogram data should naturally cluster in the lower third of the scale (levels 20 through 75). Attempting to push the overall histogram into the center during night shooting leads to severe overexposure, creating unnatural, washed-out landscapes and blown aurora ribbons.
When framing active auroras, your primary technical threat is narrow-band green channel saturation. The characteristic vibrant green aurora displays stem from atomic oxygen emissions occurring precisely at 557.7 nm. While your camera's luminance histogram may show the scene comfortably dark, this single emission line can easily blast the green channel to pure 255 clipping:
- Monitor the Green Spike: Keep your camera set to RGB display during night sessions. If the green channel hits the right wall, shorten your shutter speed. Not only does this protect tonal fidelity in the aurora's delicate curtains, but it also prevents motion blur from smearing rapid auroral wave structures.
- Snowpack Metering Realities: The internal exposure meter of any digital camera is calibrated to assume the world averages out to an many neutral gray. When framing snowfields beneath the aurora or in winter twilight, the camera meter will attempt to darken the scene, dragging pure white snow into murky midtone mud.
- Compensate for Winter Brightness: In snowbound landscapes, examine your histogram to ensure the snow data sits high in the fourth quadrant (around levels 190 to 230). Do not let it center at level 128. If it clusters in the middle, apply +1 to +1.7 EV of exposure compensation until the snow peak rests securely on the right-hand side of the graph without colliding with the vertical boundary.
For dedicated advice on planning night outings and managing dark-sky gear setups, review our Iceland aurora photography guide to prepare for extreme subarctic night shooting.
Field Testing Exposure: Histogram Pitfalls at Iconic Icelandic Locations
Applying these histogram practices in the field is best understood by analyzing the unique optical characteristics of Iceland's most famous, high-contrast compositions.
Diamond Beach (Breiðamerkursandur)
Few places on the planet present such severe dynamic range challenges as Breiðamerkursandur. Here, crystal-clear glacial ice calved from the Vatnajökull ice cap washes ashore on pitch-black volcanic sands. In bright sunrise light, the wet black sand sinks your exposure meter toward extreme underexposure, while the multifaceted, glass-like ice fragments focus direct sunlight into bright specular highlights.
When analyzing your histogram at Diamond Beach, disregard the minor, needle-thin spikes touching the right wall caused by solar glints refracting inside the ice. Instead, watch the broad, curved peak representing the internal body of the ice blocks. If that broad mass shifts beyond level 240, lower your exposure. You want the deep shadows of the wet sand to stay just above the far left wall (around level 10 to 15), preserving the raw data required to extract the subtle, velvety textures of the volcanic sediment.
Aldeyjarfoss Basalt Amphitheater
Located in northern Iceland along the Skjálfandafljót river, Aldeyjarfoss plunges through an amphitheater of stark, symmetrically aligned hexagonal basalt columns. The churning glacial meltwater is chalky, pale, and foamy, reflecting intense diffuse light, while the towering basalt cliffs cast deep, cool shadows across the gorge.
If you meter for the overall frame, the churning plunge pool will clip into an unrecoverable wash of flat white. Set your exposure manually using RGB histogram analysis. Pull the exposure down until the frothing water forms a smooth peak that terminates just short of the right wall. The basalt columns will sink into the left third of the graph. Because modern base-ISO sensors have exceptional shadow recovery, you can reliably lift those dark columns in post-production, revealing the intricate geological fracturing without introducing noticeable noise.
Logistics and Planning for Dynamic Lighting
Managing high-contrast landscapes is significantly easier when you arrive during lighting windows that minimize unmanageable solar angles. The files carry season and access notes, not live conditions. Check vedur.is and road.is for current weather and road status before setting out into remote highlands or coastal areas.
To ensure you hit these locations with the light in your favor, explore our curated Iceland landscape photography map. The files are waypoints. Your own mapping app — Gaia GPS, OsmAnd, Organic Maps, a Garmin — does the routing. If you use specialized field tools on mobile devices, follow our guides to importing waypoints into OsmAnd or loading KML files into Gaia GPS to establish seamless off-grid navigation.
Post-Processing Calibration: Reconciling In-Camera Histograms with RAW Converters
One of the most frequent points of confusion for landscape photographers is returning to the studio and discovering that an exposure showing edge clipping in the field opens in Adobe Lightroom or Capture One Pro with pristine, unclipped highlights. Understanding why this happens gives you an extra competitive edge when reading in-camera data.
Your camera's processor does not evaluate raw sensor data when constructing the on-screen histogram. Instead, it applies your camera's internal picture style (such as Standard, Landscape, or Vivid), converts the sensor readout to an 8-bit sRGB JPEG preview, and plots the tonal distribution of that temporary JPEG. Because 8-bit JPEG conversions apply a steep contrast tone curve and discard significant tonal data, the in-camera histogram shows highlight clipping and shadow crushing well before the 14-bit raw file actually runs out of headroom.
| Display Metric | In-Camera JPEG Preview Histogram | 14-Bit Uncompressed RAW Headroom |
|---|---|---|
| Tonal Depth | 8-bit (256 discrete tonal levels per channel) | 14-bit (16,384 discrete tonal levels per channel) |
| Highlight Safety Buffer | Indicates clipping prematurely (conservative) | Retains ~0.5 to 1.0 full stop of recoverable highlight data |
| Contrast Curve Influence | Stretched by active picture profile (e.g., Landscape tone curve) | Linear; zero baked-in tone curve until raw interpretation |
| Color Space Boundaries | Typically sRGB or AdobeRGB gamut limits | Native camera sensor color space (broad gamut) |
To minimize this discrepancy while shooting in Iceland:
- Select a Flat/Neutral Picture Profile: Set your camera's internal processing profile to "Neutral," "Flat," or "Monochrome" with contrast dialed down to its minimum setting. While this makes the back-of-camera preview look flat and desaturated, it aligns the in-camera histogram much more closely with the true dynamic range of your raw sensor.
- Account for the Raw Safety Margin: If your camera's neutral profile shows a faint vertical line of highlight warning on diffuse clouds or water, you generally possess between 0.5 and 0.8 EV of unclipped data in the raw headroom. However, do not treat this buffer as license to guess. Use it as an insurance policy against errant wind gusts driving sea spray or abrupt sun shifts.
- Standardize Raw Import Baselines: In raw editing software, apply a profile that maps linear raw captures accurately without crushing deep shadows. When balancing subarctic scenes, use the highlight slider to compress top-tier luminance gently while lifting the shadows, keeping black volcanic sediment rich and textured without letting it drop into digital oblivion.
Mastering Tonal Balance on Your Next Iceland Journey
Achieving consistently flawless exposures across Iceland's extreme environments requires moving past guesswork and fully committing to objective exposure evaluation. Every time you set up your tripod—whether amidst the howling winds of a black sand beach or beside a thunderous glacial fall—run through this systematic technical sequence:
- Lock to Base ISO: Preserve your sensor's full native dynamic range to maximize highlight and shadow retention.
- Engage Live RGB Histograms: Monitor independent Red, Green, and Blue channels rather than an averaged luminance readout.
- Assess Scene Dynamic Range: Determine whether the scene fits safely within a single ETTR capture, requires optical gradient filtration, or demands a multi-exposure bracketed sequence.
- Inspect the Diffuse Thresholds: Push your exposure rightward until diffuse highlight textures touch level 240–245, while allowing true specular highlights to clip safely if necessary.
- Verify the Shadow Floor: Ensure your deep shadow data clears the far left wall, isolating dark basalt detail from destructive noise floors.
By relying strictly on mathematical histogram analysis rather than the deceptive glow of an LCD screen, you guarantee that every frame you take in the subarctic captures the full grandeur of Iceland's raw, unyielding landscapes.
Frequently Asked Questions
Why does my in-camera histogram show clipping when my RAW file still has highlight detail?
The in-camera histogram is generated from an 8-bit processed JPEG preview rather than the raw 14-bit sensor data. In-camera JPEG engines apply contrast curves, sharpening, and color space restrictions (sRGB or Adobe RGB) that compress highlight data prematurely. In most modern mirrorless and DSLR bodies, there is between 0.5 and 1 full stop of recoverable highlight information remaining in the raw file even after the in-camera histogram warns of clipping.
How do I prevent the red channel from clipping during Iceland's golden hour?
To protect delicate colors during prolonged subarctic sunrises and sunsets, switch your display mode from luminance to an RGB histogram. The luminance display averages color data and will frequently mask clipping in the sky. If the red channel peak climbs against the right vertical wall, increase your shutter speed or close your aperture until the red peak sits cleanly inside the boundary, even if the overall scene appears darker on the rear LCD.
Should I expose to the right when photographing the northern lights over snow?
You should apply ETTR carefully, but do not push the entire histogram to the far right wall. An aurora composition is naturally dark, and forcing the bulk of the pixels into the upper quadrants will wash out the sky and cause severe motion blur due to overlong exposures. Instead, inspect the green channel to ensure intense 557.7 nm auroral emissions do not clip, and adjust your exposure so that bright foreground snow sits around the 70–many mark on the histogram rather than blowing out into pure white.
What is the best metering mode to use alongside histogram analysis in Iceland?
Spot metering and multi-segment (evaluative/matrix) metering paired with manual exposure mode provide the most consistent results. Multi-segment metering gives a reliable baseline for overall scene illumination, while spot metering allows you to measure the exact brightness of bright glacial ice or dark basalt sand. Once the baseline is set, make your final exposure adjustments using the camera's live RGB histogram rather than trusting the meter's suggested exposure indicator.
Download the curated GPS waypoints from Iceland Photo Map to navigate directly to Iceland's highest-contrast viewpoints with your preferred offline mapping software.