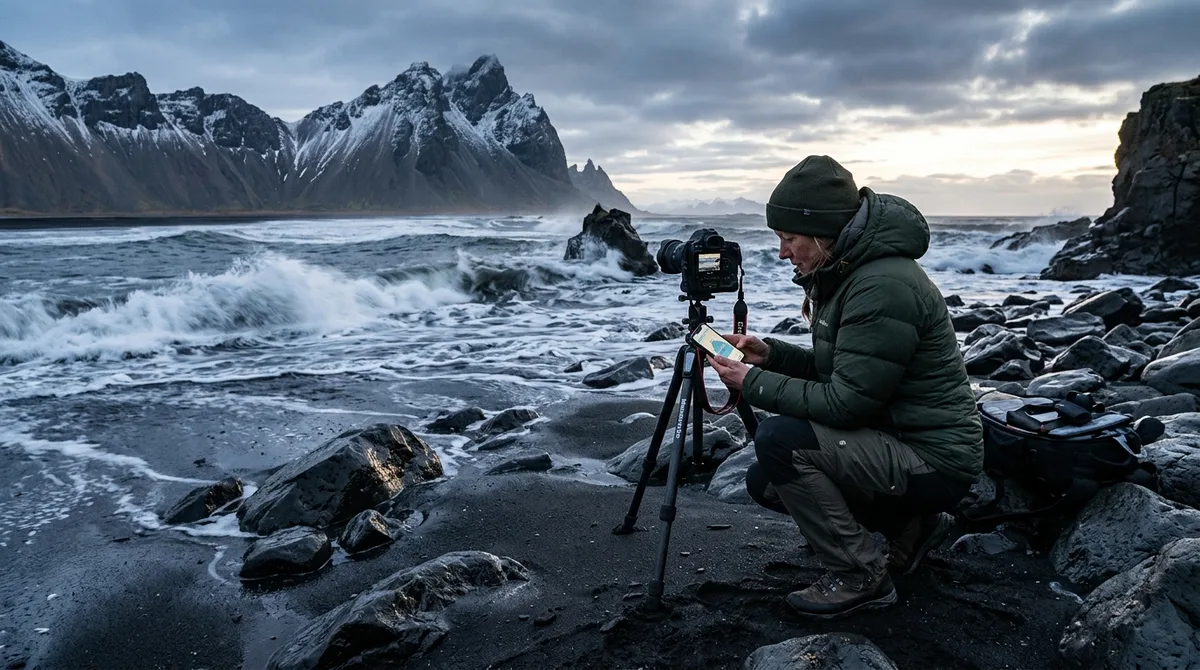
Why Iceland Photography Tide Charts Are Non-Negotiable
The tidal range in Iceland can be deceptive. While some areas experience relatively modest fluctuations, the interaction between the North Atlantic currents and Iceland’s rugged, volcanic coastline creates significant shifts in water levels. Ignoring these cycles is not just a missed creative opportunity; it is a significant safety risk. According to the SafeTravel Iceland initiative, coastal conditions can shift rapidly, and understanding the local environment is a prerequisite for any photographer venturing near the shoreline. When you analyze tide times for photography, you aren't just looking for "high" or "low." You are looking for the moment the water interacts with the foreground elements of your composition. At low tide, vast expanses of wet, reflective black sand are exposed, creating perfect "mirror" conditions that can turn a moody, overcast day into a high-impact portfolio piece. Conversely, high tide allows you to capture the raw power of waves crashing against sea stacks or entering sea caves, providing a sense of scale and motion that is impossible to achieve otherwise. Furthermore, the accessibility of many locations listed on the Iceland Photo Map is strictly dictated by the tide. Attempting to reach certain coastal rock formations or hidden sea arches during a rising tide can leave you stranded or, worse, swept into the surf. Understanding how these water levels change the landscape is fundamental to professional planning.Understanding the Basics: How to Read Iceland Tide Charts
To effectively use Iceland photography tide charts, you must first understand that these are mathematical predictions based on gravitational cycles. The Icelandic Meteorological Office (Veðurstofa Íslands) serves as the official authority for ocean condition data, providing the baseline for all reliable tidal forecasting in the region. When learning how to read Iceland tide charts, consider these three factors:- The Tidal Cycle: Most of Iceland experiences a semi-diurnal tide, meaning there are two high tides and two low tides every lunar day. However, the exact timing shifts daily, so you must check the data specifically for the date of your shoot.
- Predicted vs. Actual: Tide charts provide astronomical predictions. Weather patterns, particularly strong winds and low atmospheric pressure (common in the North Atlantic), can cause "storm surges" where the actual water level is significantly higher than the predicted tide. As noted by the Marine and Freshwater Research Institute, local bathymetry and atmospheric pressure play a critical role in real-time water levels. Treat the chart as a baseline, not a guarantee.
- Topographic Influence: The shape of the coastline drastically alters how the tide "feels." In narrow fjords, the water can rush in with surprising speed, whereas on open, flat beaches, the water may recede for hundreds of meters.
Strategic Planning: Integrating Tide Times for Photography
Successful photography in Iceland requires a multi-layered planning process. You are not just chasing the light; you are chasing the intersection of light and water. When building your itinerary, start by identifying your target locations using the Landscape photography map. Once you have a list of potential spots, cross-reference them with the tide times for your specific dates. A common mistake is to plan a shoot for the "Golden Hour" without considering the tide. If your chosen beach requires a low tide for optimal composition, but the tide is at its peak during sunset, you may find your foreground completely submerged, ruining the shot you envisioned. For those traveling the South Coast, where many of the most famous beaches are located, we recommend a "tide-first" approach. Plan your travel days so that you arrive at tide-sensitive locations during the window surrounding low tide. This provides you with enough time to scout the composition, set up your tripod, and experiment with different exposures as the water recedes or begins its slow return. When planning, consider adding a buffer of at least one hour to your schedule to account for local variances and potential surges that may occur due to the volatile North Atlantic weather.Coastal Safety Protocols for Photographers
Safety in Iceland is paramount. The ocean here is notoriously unpredictable. The primary danger for photographers is the "sneaker wave"—a sudden, powerful surge of water that travels much further up the beach than the preceding waves. Never turn your back on the ocean while setting up your gear. Even if the tide appears to be at a safe distance, the nature of the North Atlantic means that a larger-than-average wave can appear without warning. Always maintain a clear exit route toward higher ground and keep an eye on the shoreline for debris lines; these indicate how far the water has reached in recent cycles. Before heading out, consult road.is for travel conditions and ensure you are monitoring the latest alerts from the Icelandic authorities. If the weather is particularly volatile, even the most perfect tide chart cannot compensate for the danger of high winds and heavy surf.Top Coastal Locations Where Tides Change Everything
Certain locations are transformed entirely by the tide. Reynisfjara, for instance, is a different world at low tide compared to high tide. At low tide, you can walk along the base of the basalt columns and capture the reflection of the sea stacks in the wet sand. At high tide, the beach becomes significantly narrower, and the waves may reach the base of the cliffs, making certain areas inaccessible and dangerous. When using the Iceland Photo Map to plan your trip, look for the "access notes" provided for each location. We have curated these briefs to ensure photographers understand whether a specific spot requires a low-tide window to be safely photographed. These field notes are essential for navigating the complexities of the Icelandic shoreline.Tools and Apps for Tracking Iceland Tides
While specialized software exists, the most reliable way to track tides is to use the official data provided by the Icelandic Meteorological Office. Many photographers find it helpful to import these coordinates into their preferred mapping apps. If you are using tools like Gaia GPS or OsmAnd, remember that the files provided by our mapping resources are waypoints. Your own mapping app handles the routing and coordinate display. When working in remote areas, such as the Westfjords, ensure you have downloaded your maps for offline use. Digital tools are only as good as the signal you have; in the remote reaches of Iceland, you should never rely on a live data connection to check tide times at the last minute.Advanced Techniques: Long Exposures and Tidal Movement
The interplay between long exposure photography and tidal movement is where the magic happens. To capture the "silky" water effect, you need a tripod and a Neutral Density (ND) filter. When the tide is receding, the water leaves behind thin layers of film on the dark volcanic sand. This is the "mirror" effect. By using a shutter speed between 0.5 and 2 seconds, you can capture the motion of the water as it retreats, creating beautiful streaks of white foam that contrast against the dark, reflective sand. If you are shooting an incoming tide, consider using a longer exposure (10–30 seconds) to blur the crashing waves into a soft mist. This creates a more ethereal, moody aesthetic. Always be mindful of salt spray, which can quickly coat your front element. Keep a high-quality microfiber cloth and a dedicated lens cleaning kit in your pocket, and consider using a protective filter to shield your lens from the abrasive, salt-laden air.The Role of Tidal Dynamics in Composition
Beyond mere safety, tides act as a compositional tool. A rising tide can be used to create leading lines of foam that draw the viewer's eye toward a subject, such as a sea stack or a distant cliff face. Conversely, a low tide reveals the intricate textures of the seabed, including tide pools and moss-covered rocks that are otherwise hidden. By studying the tide charts, you can predict exactly when these elements will be revealed or obscured, allowing you to time your arrival for the most visually compelling conditions.Frequently Asked Questions
Are Iceland tide charts accurate for all coastal locations?
Tide charts provide a baseline, but local topography—such as narrow fjords or bays—can cause significant deviations from the predicted levels. It is advisable to add a buffer of at least one hour to your planning to account for these local variances and potential storm surges.
How much time should I buffer around low tide for a shoot?
We recommend a two-hour buffer on either side of the exact low tide time. This gives you roughly four hours of "safe" access to the shoreline, allowing you to capture the changing light and the receding water without feeling rushed or endangered by the incoming tide.
Do I need to worry about tides at waterfalls?
Generally, no. Most waterfalls in Iceland are located inland and are influenced by glacial melt and precipitation rather than the ocean. However, if you are photographing coastal waterfalls that drop directly into the sea, you must treat them with the same caution as any other coastal location.
Where can I find reliable tide data for remote areas like the Westfjords?
The Icelandic Meteorological Office remains the most reliable source for ocean condition data across all regions, including the remote Westfjords. Avoid relying on generic international weather apps, which often lack the granular data required for Iceland’s complex coastline.
Ready to plan your next coastal shoot? Explore our curated locations on the Iceland Photo Map to find the perfect spots, then use our guide to time your visit with the tides.