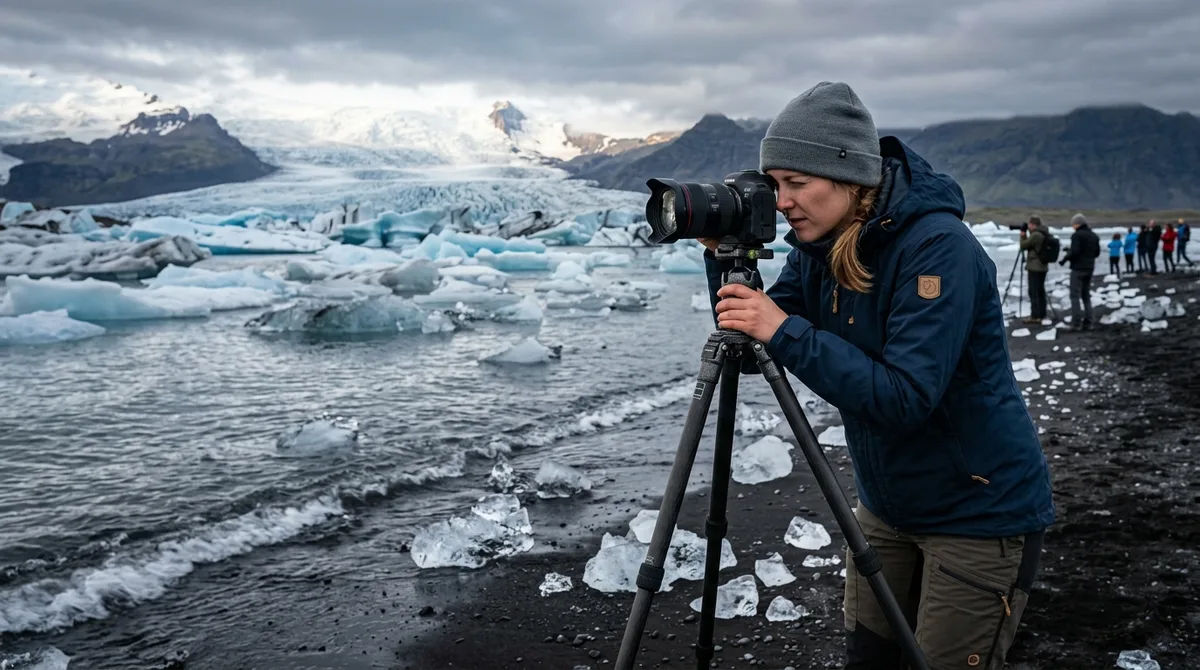
Mastering Jokulsarlon glacier lagoon photography requires balancing telephoto focal lengths to compress dramatic ice structures against carefully managed shutter speeds that translate tidal drift into dynamic motion trails. Approaching Jökulsárlón with an understanding of low-angle sub-Arctic lighting, glacial stratigraphy, and tidal currents allows you to transform an unpredictable, chaotic ice field into refined, publication-grade landscape imagery.
Located on the edge of the Vatnajökull ice cap along the southern edge of Iceland's Ring Road, Jökulsárlón is a dynamic proglacial lake filled with calving icebergs from the Breiðamerkurjökull glacier tongue. Because the lagoon is connected to the Atlantic Ocean via a short tidal river channel, water levels, ice density, and iceberg motion shift constantly throughout the day. Navigating these variables requires precise technical execution, specific focal lengths, and deliberate composition strategies.
Essential Gear and Lens Choices for Jokulsarlon Glacier Lagoon Photography
A frequent mistake when first approaching Jokulsarlon glacier lagoon photography is relying exclusively on ultra-wide-angle lenses (such as 14–24mm or 16–35mm). While wide optics excel at capturing expansive foregrounds, the lagoon basin spans several square kilometers. Wide focal lengths push the massive calving wall of Breiðamerkurjökull and distant icebergs deep into the frame, diminishing their physical scale and leaving vast expanses of empty, silt-laden water.
To capture the grandeur and intricate details of the ice, your lens selection should prioritize medium-to-long telephoto zooms:
- 70–200mm f/2.8 or f/4: The workhorse lens for the lagoon. This focal range provides optical compression that brings background mountains and the glacier tongue closer to floating midground icebergs, while allowing you to frame individual sculptural formations without distracting edge elements.
- 100–400mm or 150–600mm: Essential for isolating abstract details across the water. Long telephotos allow you to extract geometric fracture planes, deep compression-blue ice veins, and dark, stratified bands of volcanic tephra deposited by historic eruptions of Grímsvötn and Katla.
- 24–70mm f/2.8 or f/4: Useful when working directly at the water's edge on the western or eastern gravel spits, where grounded icebergs sit close enough to serve as prominent foreground anchors beneath atmospheric skies.
Filtration requires a deliberate approach at the lagoon. A circular polarizing filter (CPL) is valuable for managing reflections, but it must be adjusted carefully. Rotating a polarizer to maximum extinction removes surface glare from wet ice, revealing the deep, saturated blues beneath. However, completely eliminating specular highlights can make icebergs appear flat and matte, robbing them of their crystalline brilliance. Aim for partial polarization—cutting glare on the water's surface while preserving rim-lighting and sparkle on the ice facets.
Neutral density (ND) filters (specifically 3-stop and 6-stop filters) are essential when you want to lengthen exposures during daylight hours to capture the movement of drifting ice. However, variable ND filters should be avoided at longer focal lengths due to potential cross-polarization artifacts and sharpness degradation.
Tripod stability is critical on the lagoon shoreline. The banks consist of loose volcanic gravel and wet sand saturated by tidal fluctuations. often push your tripod leg spikes deep into the gravel bed until they hit compacted substrate. Katabatic winds—dense, cold air masses rolling down off the Vatnajökull ice cap—can accelerate across the flat water with little warning. Hang your camera backpack from the tripod center column hook to lower the center of gravity, and use a remote shutter release or a 2-second exposure delay to eliminate camera shake when shooting at 200mm and beyond.
Reading the Light: Sunrise, Midnight Sun, and Blue Hour at the Lagoon
The sub-Arctic latitude of Jökulsárlón (approximately 64°N) produces unique lighting conditions that change dramatically across seasons. Understanding solar geometry is vital for planning your vantage points along the eastern and western shores.
During the winter months (November through February), the sun rarely rises high above the southern horizon, producing an extended golden hour that lasts for hours. The low solar angle skims across the lagoon surface, providing warm directional side-lighting and backlighting that penetrates translucent ice blocks. In contrast, during the summer months (late May through July), the midnight sun dips low across the northern and north-western horizon behind the mountains, casting soft pastel pinks, magentas, and ambers over the ice field around midnight before transitioning directly into sunrise.
Blue hour—the period of deep twilight before sunrise and after sunset—is arguably the most rewarding time for photographing Iceland glaciers. Under diffused ambient skylight or soft overcast conditions, the warm spectrum of direct sunlight disappears. Without amber color casts, the short-wavelength blue light scattering within highly compressed, oxygen-depleted glacial ice becomes fully saturated. Deep cobalt, turquoise, and aquamarine hues glow intensely against the neutral tones of the water and dark moraine hills.
When composing your frame, consider how light angle dictates mood and texture:
- Backlighting: Best achieved in early morning along the northern and eastern parking areas. Backlight illuminates translucent, clear ice formations (often called "black ice" or glass ice), turning them into radiant optical prisms against darker background water.
- Side-lighting: Optimal in late afternoon from the western banks. Side-angle light carves out deep shadows within crevasses, seracs, and meltwater channels, emphasizing the sculptural, weathered topography of older bergs.
- Overcast / Flat Light: Do not pack your gear away when thick clouds roll in. Overcast skies act as a giant softbox, eliminating harsh dynamic range challenges and allowing the structural lines and volcanic ash layers in the ice to stand out cleanly.
Managing dynamic range at Jökulsárlón requires strict histogram monitoring. Floating ice covered in fresh snow or illuminated by direct sun has high luminance values, while basalt gravel banks and moraine ridges reflect very little light. Dial in exposure compensation (often +0.7 to +1.3 EV under flat light to keep whites pure rather than muddy gray) while checking your RGB highlight clipping warnings to ensure delicate highlight detail in the ice is not blown out.
Mastering Iceberg Compositions and Water Movement Techniques
A common visual challenge at Jökulsárlón is compositional clutter. With hundreds of ice fragments drifting simultaneously, wide frames can easily become disorganized. Establishing clear visual hierarchy requires identifying a dominant focal subject—a uniquely shaped berg, an archway, or an ice block with striking ash striations—and building the composition around it using negative space.
Utilize stranded chunks of brash ice along the gravel shoreline as leading foreground elements. Positioning your camera low (between knee and ankle height) brings foreground ice blocks into sharp relief, creating depth that guides the viewer's eye across the midground water toward the calving face of Breiðamerkurjökull. When shooting low, balance your aperture between f/8 and f/11 to maintain adequate depth of field, or utilize focus stacking if your foreground element sits within two feet of the lens.
Controlling shutter speed allows you to interpret water and ice motion in contrasting ways:
- Dynamic Ice Drag (0.5s to 2s): When icebergs are caught in the outflow current heading toward the tidal bridge channel, a shutter speed between half a second and two seconds renders the water as smooth, directional ribbons while keeping stationary grounded bergs crisp. This technique visually conveys the kinetic journey of melting ice.
- Ultra-Long Exposure (30s to 2 minutes): Using a 6-stop or 10-stop ND filter turns the lagoon surface into a mirror-like sheet of glass. Drifting bergs will render as ethereal, soft streaks of color, while grounded bergs remain tack-sharp. This approach works best on calm days with minimal wind-driven chop.
- Action Freeze (1/500s to 1/2000s): Crucial when capturing dynamic events such as an iceberg calving, rolling over, or fracturing. When an iceberg loses equilibrium, thousands of gallons of water cascade off its freshly exposed surfaces; freezing this spray requires fast shutter speeds and continuous burst drive modes.
Keep a safe distance while monitoring drift patterns. Icebergs that appear stable can roll suddenly due to underwater melting shifting their center of gravity. As the tide recedes, currents in the lagoon channel accelerate toward the sea, moving multi-ton bergs at brisk walking speeds and providing excellent opportunities for panning motion shots.
Navigating the Water: Jokulsarlon Boat Tours Photography Tactics
Shooting from the shoreline gives you stability and deliberate framing, but joining on-water excursions opens up unique perspectives from water level looking upward at towering ice walls. If you plan on capturing Jokulsarlon boat tours photography, selecting the right vessel type is critical for matching your photographic goals.
| Feature / Decision Factor | Zodiac RIB Boat Tour | Amphibian Boat Tour |
|---|---|---|
| Shooting Angle & Perspective | Very low water-level perspective; closer approach to safe iceberg perimeters. | Elevated deck perspective; looks downward at smaller ice fragments. |
| Mobility & Maneuverability | High; navigates deep into the lagoon near the main glacier wall. | Low; confined to larger, open channels near the main boat launch. |
| Vibration & Stability | Outboard engine vibrations; responsive to chop; handheld only. | Moderate diesel engine rumble; broad stable hull; crowded standing rail. |
| Splash & Weather Exposure | High spray potential; requires flotation suits and waterproof camera bags. | Low spray; covered/sheltered bench seating available. |
| Optimal Lens Choice | 24–70mm or 70–200mm with fast autofocus and optical stabilization. | 70–200mm or 100–400mm to reach distant bergs past tourists. |
Shooting from a moving boat introduces multiple axes of motion: engine vibration, water swell, and vessel drift. Monopods and tripods are counterproductive on boats because they transfer mechanical motor vibrations directly into your camera body. Instead, shoot handheld using the following technical safeguards:
- Maintain a baseline shutter speed of 1/1000s or faster. Even when using lenses with advanced optical image stabilization, fast shutter speeds are necessary to freeze the vessel's movement relative to floating ice.
- Set your autofocus to Continuous Tracking (AF-C / AI Servo) using a flexible spot point or subject-tracking box locked onto high-contrast ice fractures.
- Avoid changing lenses on open water. Glacial water contains fine suspended rock flour (silt), and airborne moisture combined with wind can easily deposit abrasive particulates onto exposed camera sensors. Choose a versatile zoom lens (such as a 24–105mm or 70–200mm) before boarding and seal your camera bag.
- Keep a microfiber towel or dedicated lens chamois readily accessible in an internal dry pocket to clear front-element spray between shots.
When composing from the water, use other distant tour vessels deliberately to establish scale. A small Zodiac framed against a fifty-foot-tall cerulean ice cliff instantly communicates the immense size of the glacier's terminus without making the image feel like a casual tourist snapshot.
Beyond the Main Bank: Exploring Fjallsarlon Photo Spots and Surrounding Outlets
While Jökulsárlón receives the majority of visitor traffic, the southern perimeter of Vatnajökull features several adjacent glacial lagoons that offer distinct photographic characteristics. Chief among these is Fjallsárlón, located roughly 10 kilometers west along the South Coast region.
Photographing Fjallsarlon photo spots offers a much more intimate, amphitheater-like composition compared to Jökulsárlón. At Fjallsárlón, the steep mountain ridge of Fjallskolla towers directly over the Fjallsjökull glacier tongue, which terminates right into the lake. This geographic bowl creates several compositional advantages:
- Glacial Backdrop Proximity: The calving wall is considerably closer to the accessible shoreline than at Jökulsárlón, making it easier to capture both the floating icebergs and the dramatic descent of the icefall within a single frame using a 35mm to 85mm focal range.
- Mirror Reflections: Because Fjallsárlón is smaller and partially sheltered by surrounding moraine ridges, its water surface often remains glassy during early morning and late evening calms, producing reflections of the glacier wall and Mount Öræfajökull.
- Elevated Moraine Ridges: The walking trails along the western ridge of Fjallsárlón provide elevated vantage points that let you shoot downward across the ice field, emphasizing geometric lead-in lines and floating iceberg patterns.
For photographers seeking complete isolation, Breiðárlón and Heinabergslón represent quieter alternatives. Breiðárlón sits directly between Fjallsárlón and Jökulsárlón, offering uncrowded shorelines and views of the Breiðamerkurjökull flank. Heinabergslón, located further east near the Heinaberg glacier tongue, requires navigating a rougher gravel track but rewards photographers with massive, stranded tabular bergs set against steep volcanic cliffs.
When transitioning your workflow between Jökulsárlón and these smaller proglacial lakes, widen your focal lengths slightly (e.g., 24–70mm) to incorporate the steep mountain walls that define these intimate basins, and review our curated guide to landscape photography locations for technical tips across Iceland's varied topography.
Safety and Environmental Ethics When Photographing Iceland Glaciers
Working around glacial environments in Iceland requires strict adherence to safety protocols and environmental stewardship. The dynamic nature of calved ice and tidal lagoons presents objective hazards that can quickly become life-threatening if ignored.
rarely step onto stranded or floating icebergs. This rule must be followed without exception. Icebergs that appear firmly grounded on gravel sandbars are frequently balanced on delicate pivot points beneath the waterline. Stepping onto an iceberg can shift its equilibrium, causing it to roll spontaneously. If a photographer falls into sub-zero, silt-laden glacial water, hypothermia sets in within minutes, and heavy cold-weather clothing quickly pulls you under. The outgoing tidal current under the Jökulsárlón bridge sweeps directly into the open ocean with dangerous speed.
Equally critical is respecting fragile ecosystems along the shoreline. The volcanic moraines and sandbars surrounding the lagoons are colonized by slow-growing Arctic mosses (such as Racomitrium lanuginosum ) and nesting Arctic Terns ( Kría ). Moss can take decades to recover from foot traffic compression. often stick to established walking trails and gravel paths rather than cutting across vegetated tundra banks.
Drone operations are subject to strict legal regulations. Jökulsárlón, Fjallsárlón, and the surrounding glacier tongues fall under the official administration of Vatnajökull National Park . According to the National Park Service, launching, landing, or operating unmanned aircraft is prohibited across all national parks unless approved in writing through a special use permit authorized by the park superintendent. These rules protect wildlife—such as harbor seals hauled out on the ice and nesting skuas—and preserve the natural experience for visitors. Always verify local signage before deploying flight equipment. Source: Road source.
Before traveling to the glacier lagoons, verify real-time regional travel conditions. Weather patterns in South Iceland shift rapidly, with katabatic storm systems producing severe gale-force gusts capable of damaging vehicle doors and lifting road gravel. Monitor Road.is for official road closures and travel warnings, and cross-reference cloud cover and precipitation maps on the Icelandic Meteorological Office (Veðurstofa Íslands).
Planning Field Work and Waypoints for Jokulsarlon Glacier Lagoon Photography
Executing a successful photography session at Jökulsárlón requires synchronizing your shoot schedule with seasonal light windows, tidal tables, and efficient movement between the lagoon banks and the nearby coastline.
The lagoon operates on a semi-diurnal tidal cycle. When the ocean tide falls, water drains rapidly out of Jökulsárlón through the bridge channel, carrying hundreds of sculpted ice chunks into the surf before washing them ashore onto the black basalt sands of Diamond Beach (Breiðamerkursandur). Plan your field schedule around this transition: photograph the expansive lagoon compositions during peak sunrise or sunset light, then immediately transition to the shoreline on either side of the bridge as the receding tide strands fresh, diamond-like ice blocks along the surf line.
Having reliable offline spatial data is essential when navigating unpaved shoreline tracks and locating specific vantage points in low light. When managing your field workflow, you can easily load custom waypoints by importing KML files into Gaia GPS or your preferred GPS application. The KML, GPX and GeoJSON files live on your device, so the waypoints work with no signal. Downloading offline map tiles is a separate step inside your mapping app. The files carry season and access notes, not live conditions. Check vedur.is and road.is for current weather and road status.
Pack redundant maintenance supplies in your field kit. Glacial moisture, salt spray from the nearby ocean, and sub-zero temperatures rapidly tax your equipment:
- Battery Redundancy: Cold ambient temperatures drop lithium-ion battery voltage significantly. Keep spare camera batteries inside an interior coat pocket close to body heat, rotating them as necessary during long blue-hour shooting sessions.
- Moisture Management: Pack multiple sealed, lint-free microfiber cloths in zip-top plastic bags. Once a lens cloth absorbs glacial mist or salt air, it smears optical glass rather than cleaning it. Use dedicated silicone rain sleeves to protect your camera body and lens barrel during persistent drizzle.
- Footwear and Traction: Insulated, waterproof high-ankle boots paired with gaiters are essential for working in cold gravel shallows. In winter, fit microspikes onto your boots to maintain stable footing across frozen shoreline slopes and icy parking lots.
By pairing disciplined lens choices, careful water-motion exposure timing, and robust field preparation, you can capture the raw, sculptural beauty of Iceland's most famous glacial landscape with confidence and technical precision.
Frequently Asked Questions
What is the best time of day to photograph Jokulsarlon glacier lagoon?
Sunrise and blue hour are the most rewarding times to photograph the lagoon. Early morning provides clean light, calmer winds that facilitate mirror-like reflections, and low-angle sun that backlights translucent icebergs. During blue hour, the absence of direct amber sunlight allows the deep, compressed blue and turquoise tones within the ancient glacial ice to appear fully saturated.
Which lens is most versatile for Jokulsarlon glacier lagoon photography?
A 70–200mm telephoto zoom is the most versatile lens for Jökulsárlón. It provides the optical reach needed to isolate individual floating icebergs against the distant glacier wall, compresses the scale of background peaks, and allows you to capture detailed textures and volcanic ash stratigraphy without including distracting empty water in the frame.
Can I fly a camera drone at Jokulsarlon glacier lagoon?
No, recreational drone flight is prohibited at Jökulsárlón without a specific commercial permit issued by Vatnajökull National Park. The lagoon and surrounding moraines are protected conservation zones to safeguard native bird species, harbor seal colonies, and visitor safety. often check current park regulations before operating UAVs in the region.
How does Fjallsarlon compare to Jokulsarlon for landscape photography?
Fjallsárlón is smaller, more sheltered, and less crowded than Jökulsárlón. Its compact amphitheater layout positions the steep calving front of Fjallsjökull much closer to the shoreline, making it easier to capture dramatic mountain reflections and towering ice walls with standard focal lengths (24–70mm). Jökulsárlón offers vastly larger icebergs and tidal movement but requires longer lenses to isolate subjects.
Should I use a circular polarizer when photographing floating icebergs?
Yes, but use it with restraint. A circular polarizer effectively cuts distracting surface glare from wet ice and water, revealing the saturated blues within the ice. However, rotating the filter to maximum polarization can completely eliminate highlights and make ice appear flat. Rotate the filter partially to retain edge sparkle and crystalline reflections while reducing unwanted water glare.
Download the curated South Coast photography waypoint files from Iceland Photo Map to load exact parking coordinates and landscape vantage points directly into your preferred GPS app. Exploring more photographic locations across the island? Browse our comprehensive Iceland location catalog to discover detailed coordinates, access insights, and composition tips for your upcoming journey.